Showing posts with label baked. Show all posts

Baked Strawberry Dessert Pudding

baked-strawberry-dessert-pudding
Strawberry Pudding has been a favorite since ages and eons, and as these berries are easily available almost all year round, there's no restraint on indulging in a sweet dessert pudding whenever you fancy to have one! Puddings can be of various types, creamy, gooey, gelatinous or cake-like, and as the last one is one of my favorites, I chose a baked pudding that's softer than a cake, yet light in texture. The inspiration came from a craving for a traditional Strawberry Shortcake, but I didn't have the ingredients nor the patience to make one. So, the easiest way to create a satisfying substitute was to use the same flavors, and bake a pudding! With strawberry puree, fresh sliced strawberries a hint of lemon and brown sugar, and topped with whipped cream and chocolate sauce, this Baked Strawberry Pudding is a perfect dessert for those sudden sweet-tooth cravings.

Ingredients
8-20 large fresh strawberries
1/2 tsp lemon juice
1 tbsp brown sugar
2 tbsp unsalted butter
1/2 cup caster sugar
1 cup all purpose flour
3/4 cup milk
1 large egg - separated
**add one more egg for a souffle-like pudding

For Garnish
more strawberry slices
sprig of mint
whipped cream
chocolate sauce

Method
Take the strawberries, leaving 2 aside, chop them and make a strawberry puree by slowly heating them with the cane sugar and lemon juice, until they are soft, and almost macerated(pulp). Strain the puree through a fine sieve to remove the seeds and excess pulp; then keep aside.

Slice the remaining 2 berries into thin slices, 4 slices per berry.

Butter 4 small ramekins and set aside. Preheat your oven to 350F.

Beat the butter and sugar in a medium bowl until combined. Sift in the flour. Stir in the milk, egg yolk and 1/4 cup of the strawberry puree till combined.

In another bowl, whisk the egg whites until stiff. Fold in gently into the batter.

Place the 4 strawberry slices on the sides of the buttered ramekins. Then pour the batter, filling them upto 2/3 height, leaving some room to allow the pudding to expand. Bake for about 15 minutes or until the top is light golden brown, and the pudding separates from the sides.

Allow the ramekins to cool down. Gently invert each ramekin over a dessert plate. Top with some whipped cream and strawberry slices. Drizzle with the remaining strawberry syrup and chocolate sauce. Its like a strawberry shortcake in itself!

Garnish with a sprig of mint, and serve your delicious Baked Strawberry Pudding for a light and airy yet comforting dessert!

Related Recipes:
Mixed Berry & White Chocolate Pudding
Low-Fat Strawberry Vanilla Cake
Peach Melba with Vanilla-Cardamom Ice Cream
Vanilla Panna-Cotta with Balsamic Strawberries

Related Tags
, , ,


Read more!

Blueberry Orange Sour Cream Bread

blueberry-bread-recipe

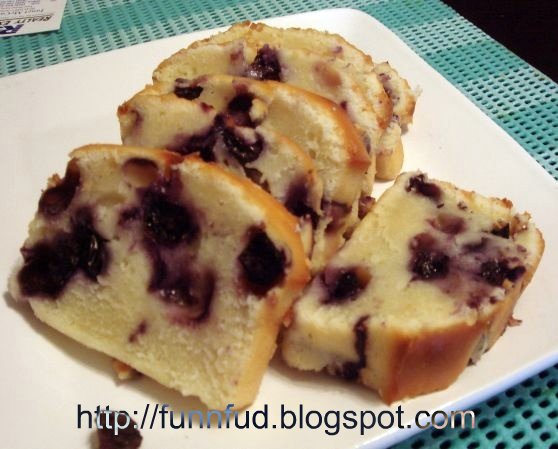
Sweet breads are a great way to enjoy the goodness of a cake-like dessert which can be relished by itself, or even be paired with tea or coffee. Fruit breads are not only easy to make, they can be really versatile to incorporate seasonal ingredients. This week we enjoyed baking this Blueberry Bread, made even more delicious by addition of citrusy Orange flavor, and made soft by using Sour Cream. The bread not only smells great, it can fill your kitchen with a refreshing aroma that lingers long after you've finished your delicious loaf of Blueberry Orange Bread.

Ingredients
1 cup whole grain flour
2 cups all-purpose flour
1/2 cup sour cream
1 stick butter - at room temp
1 1/2 cup cane sugar
4 large eggs
Zest of 2 large oranges
3/4 cup fresh orange juice
2 tsp vanilla
4 tsp baking powder
1 tsp salt
1 cup blueberries

Method
Spray 2 bread pans generously and keep aside. Preheat oven to 350 deg F.

Cream butter and sugar in large bowl. Beat in eggs one at a time, then orange zest, orange juice and vanilla.

Thoroughly combine flour, baking powder and salt in medium bowl and add to creamed butter mixture. Slowly add the sour cream and mix everything well to form an even blend.

Fold in the blueberries, taking care not to mix too hard so s to break them.

Bake in the middle rack for 45-50 minutes at 350 F, until the loaves swell up and pass the toothpick test. When done, let them rest on the wire rack till they cool to room temp. Only then attempt to cut the loaf into slices.

Store in a cool, dry container and you can relish this bread for up to a week. It tastes great 2-3 hours after baking, as the orange and blueberry juices slowly sink in to make a moist flavorful bread!

This has now become one of our cherished breakfast recipes. Enjoy it yourself either with your morning tea, or serve them as a sweet treat at your next Tea party!


Read more!

Classic Scottish Shortbread

scottish shortbread

Scotland is as well known for its Food, as it is for its history, folklore and festivals. Some people think Scottish food is not for the faint-hearted - they use varieties of meat and spices that might not gel with everyone. However, when it comes to Desserts, they are a safe bet, and Scottish pastries are famous for being not overly-sweet, with a flaky crust and nice fresh fruit filling. But even if someone is not familiar with Scottish food, I am sure they will know about the Scottish Shortbread. [photo courtesy of Rita Maas via Fine Cooking]

Shortbread is the simplest of preparations, flour, butter and sugar, and also one of the fastest cookies that I have baked! The end result relies heavily upon the flavor of the butter, so don't compromise here, and DO NOT think about calories when you bake a Shortbread. This recipe is adapted from The Edinburgh Book of Plain Cookery Recipes. It has loads of authentic recipes that you will love.

Scottish Shortbread Recipe

Ingredients
1-1/2 cup flour
1/2 cup rice flour
8 ounces salted butter, softened at room temperature
1/2 cup superfine sugar
1 tsp vanilla extract

Method
Combine all ingredients in the bowl of a standing mixer, paddle until the dough clumps together. You can even do this by using a ladle or your hands. Break the butter into chunks and slowly mix it in with the flour to form the dough.

Press the dough in a 8-9 inch cake pan, pressing it gently to attain 1-2 inch thickness, depending on how you like your shortbread. Line the pan with heavy aluminum foil, letting the foil extend over two sides of the pan, then press the dough. This will help to lift out the shortbread after it is baked, and cut it into pieces.

Prick with a fork to decorate if you wish. Bake in a 350 degree oven for 25 to 35 minutes, or until cooked through and lightly browned. Cut into appropriate sized pieces while it’s still warm, and allow to cool completely before removing it from the pans.

Related Recipes
Pistachio Shortbread Cookies
Chocolate Nutella Cookies
Coconut Cookies with Vanilla Icing


Read more!

Magic Cookie Bars

magic-cookie-bars
I have to admit I have a very soft spot for Brownies - being the easiest to bake, these are one of my cherished desserts, especially when you need something quick and satisfying to uplift your mood or indulge your sweet tooth. Plus, they are a hit with my toddler too, though I try to restrict indulging her!

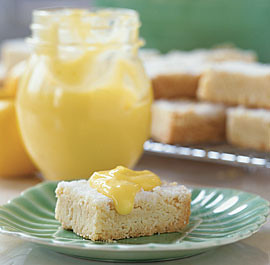
The Magic Cookie Bars, or Blondies, as I would call them, are a lovely variation from the traditional brownie recipe. It does not use any flour, just graham cracker crumbs, condensed milk and your favorite toppings. Plus, it is so versatile, you can easily swap toppings with your favorite ones, peanut butter chips, butterscotch chips, white chocolate, pecans, pistachios, almonds - throw in everything and you'll still end up with one perfect recipe!


Ingredients
1/2 cup butter or margarine, melted
1 1/2 cups graham cracker crumbs
1 (14 ounce) can sweetened condensed milk
1 cup semisweet chocolate chips
1 cup butterscotch chips
1 1/3 cups flaked coconut
1 cup chopped nuts

Method
Heat oven to 350 degrees F (325 degrees for glass dish). Coat 13x9-inch baking pan with non-stick cooking spray.

Combine graham cracker crumbs and butter. Mix well with your fingers so everything is evenly buttered. Then press gently into bottom of prepared pan, evening out the layer with your palms.

Pour sweetened condensed milk evenly over crumb mixture. Layer evenly with chocolate chips, coconut and nuts. Press down firmly with a fork.

Bake 20-25 minutes or until lightly browned. Allow to cool completely on a wire rack. Then take a serrated knife and cut into bars or diamonds.

The magical Blondies can be stored in an airtight container at room temperature up to 2 days.

Related Recipes
Mango & Coconut Snack Cakes
Mocha Pistachio Brownies
Blueberry Orange & Sour Cream Cakes


Read more!

Baking Christmas Cookies For Santa

christmas cookies

My mom was an amazing baker-extraordinaire, and most of my favorite childhood memories revolving around Christmas involve baking cookies. It never got old, and whether we were decorating melt-in-your mouth sugar cookies with piping of all colors and styles or gluing on the perfect accessories to our gingerbread men, I loved it. It formed a bond with my mom that we will both cherish forever. Even now, 20+ years later, when December hits, all I want to do is go home, turn the Christmas music up, the oven on, and bake cookies with mom.

Part of the intrigue after the piles and piles of cookies were baked and decorated to child-like perfection was the finale: when we got to create a plate for Santa. Of course, Santa can eat everything and multiples of it, so we always had a giant plate and we put at least two of everything we had made on that plate. I was very protective of those cookies. No one (especially not a sneaky brother) was going to touch any one of them. They were for Santa and Santa alone. And, first thing Christmas morning, it was a mad dash to make sure that Santa had eaten them all, drank his milk and left just the appropriate amount of crumbs behind. He never failed me.

This year, I encourage you to bake cookies with your children. What better way to spend a Sunday afternoon than in your kitchen with flour flying and little fingers dipped in red sugar crystals? Play some of your favorite music and show your kids a new kind of Christmas magic. I guarantee that you won’t forget it and neither will they. And, after all, do you really think Santa prefers homemade cookies or those pre-packaged, cardboard cutouts? I’d venture to say he’d rather your child’s attempt at a cookie (regardless of what it tastes or looks like) than anything else.

If you’re at a loss for where to start, try the sugar cookies above. It’s a very simple recipe that my mom and I are both in love with. It’s called a sugar cookie, but don’t let that fool you. It’s got sour cream that makes it to-die-for, and I’d describe it somewhere between shortbread and sugar cookie. Plus, while the mixing and baking is fun, there’s something about decorating cookies after that I believe absolutely every child should be a part of. P.S. Don’t forget the milk!

Here are some more Christmas Cookie recipes that Santa will love!

Perfect Shortbread Cookies
Peppermint & Vanilla Butter Cookies
Raspberry Blondies (Cookie Bars)
Chocolate Marshmallow Mud Cookies
Snowflake Sugar Cookies
Pink Meringue Cookies
Chocolate-Dipped Madeleines

This article is written by Tara Alley, who is a freelance writer from Big Sky, MT, a passionate baker and a lover of all things coffee-related. She is now living in the heart of Orange County, CA, working for Coffee Home Direct, promoting coffee makers and coffee accessories. You can reach her at: tara@coffeehomedirect.com.
Photo: iStockPhoto.com
Recipe: Allrecipes.com


Read more!

Baked Apple Cinnamon & Goat Cheese Tart

apple-goat-cheese-tart

Goat cheese, sometimes called chevre, is a cheese product made from the goat's milk. Goat cheeses can range in taste from strong and pungent, to delicate and mild, however, it does have a distinct tangy flavor which it inherits from the hormones in the goat's milk. The latter is much more similar to human milk than that of the cow, being much thinner, lower in fat, and higher in vitamin A and potassium. Hence Goat Cheese is also a healthy alternative to full-fat cheese like Cream cheese, and is also a favorite among gourmet chefs. It comes in several shapes and flavors - plain or mixed with olive oil and herbs, marinated or sometimes even sampled as a dessert cheese, mixed with chocolate or fruits.

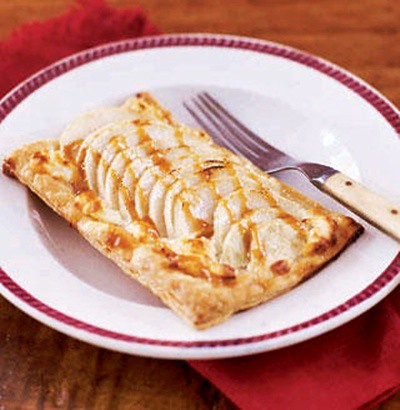
In this extremely simple Tart recipe that is adapted from the Woman's Day magazine, [photo courtesy of Frances Janisch] we combine Goat cheese with Apples and Cinnamon to make this gorgeous and very delicious tart. The mildly pungent flavor of Goat cheese pairs well with the sweet granny Smith apples, and the flavor is accentuated by adding a hint of cinnamon and nutmeg to bake this tart which uses Puff Pastry as a base. The original recipe called for using Apple Jelly, but I decided to saute the apples in a sugar syrup instead, flavored with the spices so the fruit gets a deeper flavor when it is baked. Feel free to modify the recipe to pair cheese with your favorite fruit and you'll end up with a quick-fix dessert recipe that is elegant and delicious in itself.

Ingredients
6 oz goat cheese
1 sheet frozen puff pastry, thawed as pkg directs
3 medium Granny Smith apples - choose the sweet ones
2 Tbsp apple jelly, at room temperature
a pinch of cinnamon
a pinch of nutmeg
2 Tbsp sugar
1/2 cup water
some caramel sauce to drizzle on the tart (optional)

Method
Heat oven to 400°F. Have a large baking sheet ready. Place goat cheese in freezer 10 to 20 minutes to make it crumble more easily.

Unfold 1 sheet of pastry; roll out on a lightly floured surface with a floured rolling pin into a 12-in. square. Cut in half lengthwise. (You can make more cuts if you wish to make small individual-sized tarts). Place 1 inch apart on ungreased baking sheet. Prick each piece with a fork several times to within 1/2 in. of edges.

Divide goat cheese into 6 portions. Crumble 1 portion on each pastry to within 1/2 in. of edges. Refrigerate the prepared sheet while preparing the apples.

Peel, halve and core the apples. Slice each half crosswise in 1/4-in.-thick slices. Take a pan on medium heat and boil the water. Add the sugar to make a thick syrup. Add in the nutmeg and cinnamon, then saute the apple slices in the syrup till they become a little soft and are coated evenly with the syrup.

Remove tarts from refrigerator; arrange apple slices in a row, overlapping as needed, on top of cheese on each tart.

Bake 30 minutes or until pastry is golden, and apples are tender and start to brown at edges. Serve warm or at room temperature with caramel sauce to drizzle on tarts.

Recipe Variations
These tarts are best enjoyed warm, probably 5-8 minutes out of the oven. If you don't have caramel sauce on hand, dust it with some powdered sugar instead. If you are not much of an Apple person, no worries; goat cheese pairs well with other fruits like Peach, Plums or even cherries!

Related Recipes
Spiced Apple Bread
Best Homemade Apple Pie
Upside Down Apple Cake
Fried Apple Pies (Empanadas)


Read more!

Mango Coconut Snack Cakes

mango-coconut-cake
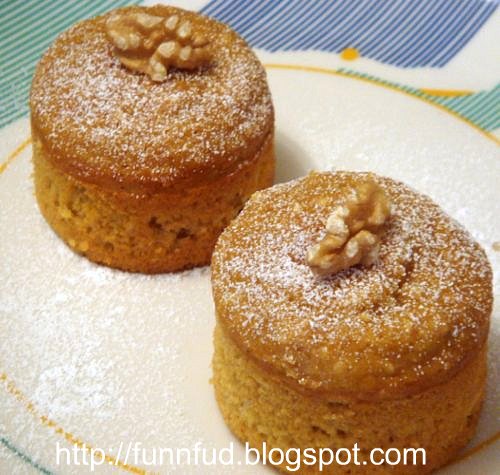
Summer is the time I miss India the most - No, NO, not for the Heat, but for the delicious Mangoes that we relished during the season, never mind the pounds it added to my frame! Indian Mangoes have no parallel, but after so many years in the US, I guess we've started appreciating the fact that we can at least get mangoes in California, and they are of "decent-quality". So to satisfy my Mango mania, I baked these Mini Mango-Coconut Snack Cakes, a healthy, delicious alternative to regular decadent cakes or muffins. Made with whole-wheat, and a low-sugar content, these baby cakes can be eaten for breakfast, or turned into delicious desserts by sprinkling some icing sugar, and maybe some syrup or whipped cream on the top!

Ingredients
Makes about 12 mini cakes

2 large eggs
1 tsp vanilla extract
2 tbsp vegetable oil
1 cup whole wheat flour (optional, you can use AP flour instead)
1/2 cup all-purpose flour
1.5 tsp baking soda
1.5 tsp baking powder
1/2 tsp salt
4 tbsp chopped walnuts
1 cup mango pulp - sweetened
1/2 cup unsweetened shredded coconut
2-3 tbsp sugar (depending on how sweet your mango pulp is)

Method
Preheat your oven to 325 degrees F. Grease and flour your large muffin pans or 12 individual ramekins and set aside.

Beat the eggs, oil and vanilla together. When it becomes fluffy, add in the mango pulp and mix well.

In another bowl, mix all the dry ingredients except coconut flakes and walnuts.

Now slowly pour the dry ingredient mix into the egg mixture and keep beating on medium speed. Do this till the entire cake batter becomes smooth and uniform, about 5-8 mins. Finally, fold in the shredded coconut and the chopped walnuts.

Distribute evenly in the prepared cake pans and bake for at least 20-25 mins, until a toothpick inserted in the center comes out clean. Turn off the oven and let the mini cakes cool on the wire rack for 5 mins.

Then gently turn out the cakes from the pan. Garnish with a topping of more walnuts if you like, and sprinkle some confectioner's sugar on the top.

These taste great with tea or coffee, and as they are low in sugar and trans-fat, they are also a healthier option to indulge in!

These Mango-Coconut Cakes are my entry to the SHF-Fruit & Nut event being hosted on this blog this month. If you haven't sent them in already, I'm looking forward to your entries.

Related Recipes
Raspberry Almond Crumble
Chocolate Hazelnut Coffee Cake
Mango Cake with Streusel Topping


Read more!

Paneer Tikka with Mango Sauce

paneer-tikka-tandoori
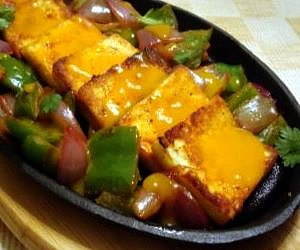
Tandoori Paneer Tikka - the name itself makes my mouth water!! Succulent cubes of paneer marinated and grilled or baked in a "tandoori oven", then served with grilled vegetables, is enough to tempt anyone on earth. But this time around, inspired by combining the Indian and Asian tastes in one dish, I have tried a variation which still uses a spicy yogurt marinade, but the final Paneer Tikka is then served hot, drizzled with a home-made sweet and tangy mango dressing, and serves to be a perfect side-dish to an Indian meal. Sounds inviting, right? Just wait till you've actually tasted it, maybe you wouldn't like leaving any for your guests!

I'm sending this to WYF-Side Dish event over at Simple Indian Food.

Ingredients
Fresh Paneer - cut into thick cubes
1 large bell-pepper - diced into squares
1 large red onion - diced into thick slices
Cooking Oil

Tandoori Marinade
1/4 cup yoghurt
2 tsp ginger-garlic paste
1 tsp red chilli powder or paprika
1 tbsp tamarind paste
2 tsp pickle(achaar) - optional
1 tsp salt
3 tbsp lemon juice
1/2 tsp turmeric powder
1/4 tsp orange food color(optional, I did not use it)
1 tbsp tandoori tikka masala (or garam masala)

Mango Dressing
1/4 cup mango puree
4-5 tbsp orange juice
1 tbsp olive oil
2 tbsp lemon juice (or white wine vinegar)
2 tsp honey or sugar - if required
1/2 tsp salt
freshly ground black pepper

Method
Take the paneer cubes and add them to 1/4 cup of water along with 1/2 tsp turemric powder, 1/2 tsp salt and 1 tbsp lemon juice. Soak them for at least 10 mins.

Now take the yoghurt and pass it through a muslin cloth, removing all water content and leaving only the firm yoghurt part. Add all the Marinade ingredients to it; mix well, adjust spices according to taste and set aside.

Now add the marinade to a zip-lock bag, then add all the paneer cubes(remove from salt water) into it, shake it arund so all pices are coated with the marinade, then refrigerate it for at least 2 hours (or maximum overnight).

Baking
Preheat oven to 400 deg F. Now grease a cookie sheet with ample amount of coking oil, then place the marinated paneer pieces on the tray; remove the yogurt sticking on the pieces as it would stick on the sheet while baking.

Apply some light oil on each piece with a brush, sprinkle some more tandoori masala on top, then bake for 10-12 mins. Then flip them over, apply oil on the other side and bake again for another 10 mins (depending on yoor oven, it may take longer) Check after 15 mins to see if the pieces are cooked through evenly.

Turn oven setting to BROIL and allow it to broil for another 2 mins.

Meanwhile, take a pan, add 2 tsp oil to it, and add the cubes of onions and bell-peppers. Saute them on medium-flame till they are semi-cooked and turn glossy. Add some salt and lemon juice according to taste.

Turn off the oven and gently lift the pieces, arrange them on a serving plate. Add the sauteed bell-peppers and onions to the plate, and garnish with some Mango Dressing and chopped coriander.

Grilling or Shallow-Fry
You can cook the paneer and veggies by arranging them on a skewer and grilling it on a hot barbecue grill. Use the same procedure as above, just use grill instead of a conventional oven. Shallow-frying the paneer pieces, just like the veggies is another quick option, but you may not get the smoky, grilled look with this method. But you can choose any method depending on your convenience.

Sweet and Tangy Mango Dressing
Mix the mango puree with all the other ingredients for the dressing and blend well to form a smooth liquid sauce. If its too thick, add some more orange juice; it should be thinner than normal mango puree, but thicker than water.

Arrange the grilled paneer and vegetable on a platter. Top with some Mango Dressing and cilantro. Serve hot as an appetizer or a side dish!

We always order Tandoori Paneer Tikka in restaurants, but now that I have mastered the art of making it at home, we often enjoy it as dinner, just by itself! The addition of Mango Dressing was a winning brainwave, and the basic recipe for the sauce as well as the Tandoori Marinade can be used for any other tikka recipe.

Related Recipes:
Achari Paneer Tikka Wraps
Spicy Chilli Paneer
Savoury Paneer & Sun-dried Tomato Muffins
Restaurant-Style Paneer Butter Masala


Read more!

Pineapple Muffins

apple-bread-recipe
One of the best ways to enjoy fresh pineapples is to bake cute little Pineapple Muffins out of them! Next to Blueberry Muffins, these have got to be my favorite snack. I love Pina-Colada, os I decided to combine the great flavor combo of Pineapples and Coconut to bake these baby cakes, that are delicious and filling, and don't take much preparation. You can zest them up by adding orange, lime, or even spices, but I love them as they are, with a hint of coconut essence, fresh pineapple cubes, and nice chredded coconut!

Ingredients
Makes 12-15 medium-sized muffins

1-3/4 cups all-purpose flour
3/4 cup sweetened pineapples - diced or crushed
2 tbsp shredded coconut
1 egg
*** substitute 1/4 cup vanilla or plain yogurt for an eggless version
1 cup castor sugar
1 tsp coconut essence
1/2 tsp orange extract (optional)
1/2 tsp salt
3/4 cup milk (or sour cream)
1/3 cup butter - at room temperature
1 tsp baking powder

Method
Preheat oven to 350 degrees F and prepare muffins pans by greasing with non-stick spray, or line them with paper-liners.

In a large bowl, sift together the flour, sugar, baking powder, and salt.

Combine egg, milk, and melted butter in another bowl. Beat a little to combine everything together and make it frothy. Now add this to the dry mixture just until combined. Do not over-beat. Fold in the pineapples and the shredded coconut and gently stir to combine.

Spoon the mixture into the moulds (upto 2/3 full) and bake for 20 minutes, until the tops rise and become golden.

Let the muffins cool in the rack for 10 mins. Then gently remove then from the moulds and transfer to a wire rack to further cool for another 5-7 mins. (If you don't let them cool enough, the tops may sag, like mine did:))

Serve the Pineapple muffins, or baby cakes, as I like to call them, with some fresh Indian Chai. You can even layer it with some orange marmalade, or deck it up with whipped cream! Enjoy the taste of Pina Colada, albeit in a Muffin form!

This is my entry for the BBD#18 - Quick Breads that is currently running on this blog. You still have until April 1st to send in your entries. So bake something quick, and send it over!

Related Recipes:
Mango Streusel Cake
Low-Fat Blueberry Muffins
Eggless Cranberry Walnut Scones


Read more!

Fudgy Mocha Pistachio Brownies

recipe-brownies
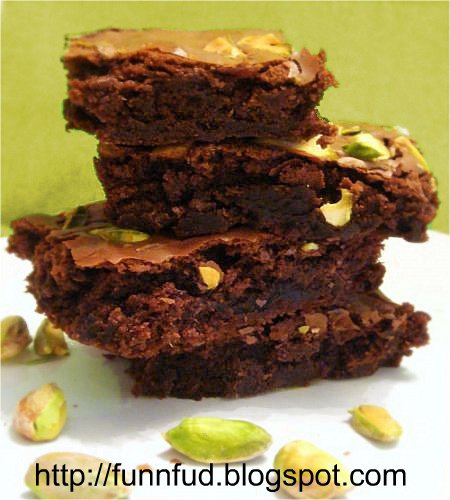
Baking Brownies is an uplifting process for me! And these Chewy Mocha Pistachio Brownies have become my current favorites! Unlike other baking desserts, brownies are more stress-free, and easily customizable.The texture of a brownie, whether its fudgy, moist and chewy, or light like a cake, depends on the amounts of chocolate, butter, sugar, and flour that you use in the recipe. I chose to go with the Chewy this time. And as it was for a weekend breakfast, I added some flavored coffee powder to my pistachio brownies. I also threw in some cranberries, to make them more chewy, and the result was a seriously decadent Brownie recipe that I wouldn't trade even for a store-bought one!

Coffee lovers will always find a way to enjoy more caffeine in their lives; so off this goes to Meeta's Mingle, featuring Coffee & Tea this month. And as I'm really proud of these decadent Brownies, which have a great flavor combination, I'm sending these to Aparna's Sweet Celebrations as well!

Ingredients
1 packed cup all-purpose flour
2 tbsp natural cocoa
4 oz. unsalted butter
4 oz. unsweetened chocolate
1-1/2 cups sugar
1/4 tsp. salt
2 tsp cafe mocha (flavored instant coffee powder)
2 large eggs, at room temperature
1/4 cup slivered unsalted pistachios
2 tbsp craisins or dried chopped cranberries (optional)

Method
Position an oven rack on the middle rung. Heat the oven to 350°F. Butter an 8-inch square brownie pan, line the bottom with parchment paper, and spray it with some non-stick cooking spray.

In a double boiler, melt the butter and chocolate, stirring continuously to form a smooth ganache. Remove the pan from the heat and allow to cool slightly.

Stir in the sugar, salt, and the mocha coffee powder. Mix in the eggs, one at a time, stirring each time until blended. Finally add the flour and cocoa.

Beat well, until incorporated and the mixture is smooth, 30 to 60 seconds. Add the chopped pistachios and craisins, and give a final whisking.

Scrape the batter into the prepared pan and bake until the brownies are thoroughly baked, form a slightly-cracked layer on the top, and a toothpick inserted in the middle comes out almost clean, about 35 to 45 mins.

Set the pan on a rack until cool enough to handle. Run a paring knife around the inside edge of the pan and then invert the pan onto a flat surface and peel off the parchment. set the baked brownie back onto the rack to cool completely.

Cut into squares with a sharp knife. Enjoy your Chewy Mocha Brownies with a cup of hot Mocha, and you'll start appreciating caffeine even better!:)

Related Recipes:
Chocolate Peanut Butter Bars
Almond Mocha Iced Frappucino
Mocha Hazelnut Coffee Cake


Read more!

Spiced Apple Bread Recipe

apple-bread-recipe
Fall is the harvest season, and the markets are flooded with lovely golden Apples, inviting us to cook them, drink them, jam them, or bake them into something delicious! This Spiced Apple Bread is one such treat that exudes the flavors of fall in all its glory. Made with fresh apples and chopped nuts, and flavored mildly with cinnamon and nutmeg, I had as much pleasure baking it, and smelling it as it cooked in the oven, as I had in devouring it like crazy with a dollop of butter and orange marmalade! I have never been too keen about Apple desserts, but I love this Apple Bread, and I know I'll be baking it quite a lot! [img credit: hunnybscakery]

Ingredients
2 cups sweet apples - shredded or chopped finely
1 3/4 cups all-purpose flour
1/4 cup oil
1/4 cup butter
2 small eggs (or 1.5 large eggs)
1 cup brown sugar
1 tsp vanilla
1/2 tsp cinnamon
1/2 tsp nutmeg
1/2 tsp baking soda
1/2 tsp salt
1/2 cup finely chopped nuts (optional)

Method
Cream the butter (at room temp) with the sugar, then combine with the oil, eggs, and vanilla and set aside.

In another bowl, sift the flour, cinnamon, nutmeg, soda, and salt. Add dry ingredients to oil mixture gradually. Finally add the apples and nuts.

Grease one loaf pan, or line it with parchment paper. Pour the batter into the pan, and bake at 325 deg F for about 50 mins (check after 40 mins) till its brown on the outside, appears crusty, and the toothpick test passes.

Allow to cool for 10 minutes in the pan after switching off the oven, then let it cool completely on a wire rack.

Run a knife under warm tap water, and use this to slice the bread. Store in an air-tight container. Enjoy this delicious Spiced Apple Bread with butter or honey as you celebrate Fall flavors!

Related Recipes:
Chocolate Zucchini Bread
Chocolate Banana Bread
Coconut Pandan Bread


Read more!

Green Coconut Pandan Cakes - Asian Delight

coconut-pandan-cakes
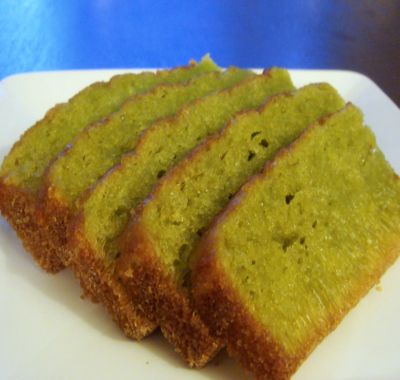
Pandan Cake is a light, fluffy cake of Malay origins (Indonesia, Malaysia, The Philippines) flavored with the juice of Pandan (Pandanus amaryllifolius) leaves. I've always been fascinated by their beauty! These cakes are light green in color due to the chlorophyll present in the leaf juice. But most of the times, additional green food coloring is used to further enhance its colour. Right from the time I tasted one at an Asian Cafe, I've been wanting to try these at home. Luckily, I found some Pandan Extract in my grocery store and I could finally make this chiffon cake, where I paired Coconut with Pandan! This may not be the best flavor for cakes in the world, but these Coconut Pandan Cake slices are definitely unique, looks pretty, and is should be tried at least once!

I used a recipe given by Anna, my colleague's wife, and I did trouble her a lot with phone calls as I was really apprehensive about how these would turn out! She was pretty patient with me, and I'd like to thank her for all her help and tips! I did end up adding a teeny-bit more green food color, hence the darker shade. Also, maybe the Pandan extract is not as good as the Pandan juice, hence I got a little "stretchy" texture in the bottom part of my cake. But otherwise, this was a successful experiment, which tasted great!

Ingredients
1 1/2 cups all purpose flour
1/2 cup sugar
2 tbsp butter
1/2 cup water
1.5 tsp baking powder
1/2 tsp baking soda
1/4 tsp salt
1 tsp Pandan extract
1/2 tsp green color
1 egg
2 tbsp cooking oil
4 tbsp coconut cream

Method
Preheat oven to 375F. Line a bread-baking tray, or a cake pan with a wax paper and set aside.

In a bowl, lightly beat the eggs, add water, coconut cream, oil, pandan extract, salt, sugar, baking powder & baking soda and mix well.

Sieve the flour, and slowly pour into the mixture, mix well, and set aside.

Pour the mixture into the prepared bread or cake tin. Bake for 20 to 25 minutes or until a light brown crust appears on the top, and the tooth-pick test is satisfied.

I particularly loved the flavor of coconut with pandan; by itself, it may not have been as tasty, but the coconut cream made this a winning recipe! After a lot of hype and hooplah, I was happy at how this cake turned out.

Thanks Anna, for a beautiful Coconut Pandan Cake recipe!


Read more!

Savoury Cheese Breakfast Muffins

Gujarati Dal
Savoury Muffins are the best way to kick-start a day, especially when they are loaded with Cheese and veggies, providing enough protein and other nutrition that will make you fresh and fit early in the morning! I had some left-over Pizza sauce and as I'm going to be leaving for a vacation in a couple of days, I wanted to clear my pantry of the cheese and veggies that needed attention! So, what better way to use these than throw it all together in muffin moulds?!! - the result, these easy and wonderful Breakfast Muffins. Filled with the goodness of protein-rich cheddar cheese, eggs, anti-oxidant -rich bell peppers, yogurt, and the flavors of Italian spices, these Savoury Muffins are indeed a treat to bake and to devour!

Ingredients
2 cups all-purpose flour
1 tbsp baking powder
1 tsp salt
1 tsp dried basil
1/2 tsp baking soda
1 cup orange cheddar cheese cubes (or shredded cheese)
1 cup plain yogurt
2 eggs
1/4 cup butter, melted
1/2 cup chopped red or green bell-peppers
1/4 cup pizza sauce
1/2 cup shredded mozzarella

Method
Preheat oven to 400ºF. Line 12 muffin cups with paper liners and keep ready.

In a large bowl, whisk together flour, baking powder, salt, basil and baking soda until combined. Stir in the cheddar cubes.

In a medium bowl, whisk together the yogurt, eggs and butter until smooth. Stir into flour mixture just until well combined and no dry spots remain; stir in the pizza sauce and the bell-peppers at the very end. The batter will be very thick, but don't worry, that's how it's supposed to look!

Spoon the batter into muffin cups, dividing evenly. Sprinkle shredded mozzarella cheese on top of each one.

Bake about 20 minutes, until golden brown, and a toothpick inserted in the centre of one of middle muffins comes out clean.

Let the muffins cool in pan at least 5 minutes before removing, then allow them to cool completely on a wire rack.

Brew a cup of fresh cappucino (or espresso, if you must), and serve these delicious Savoury Cheese Muffins for a healthy, nutritious and lavish breakfast!

Related Recipes:
Steamed Dhokla Sandwich
Tomato Herb & Cheese Bread
Paneer & Sun-dried Tomato Muffins


Read more!

Cranberry Orange Bread with Pecans

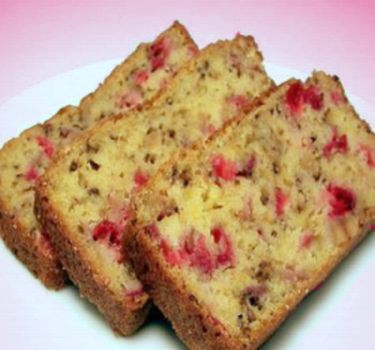
cranberry-orange-breadCranberry Bread, flavored with zesty Orange and filled with the goodness of Pecans and crushed almonds, and topped with a layer of butter or maple syrup, served with a cup of hot tea or coffee! Does it sound like a scintillating breakfast or not? I, for one, would never refuse a platter like this, and neither should you! Cranberries are a wonderful summer fruit, and when paired with citrusy orange, it invokes a lovely flavor and aroma that is sweet and invigorating. I love walnuts, and pretty much throw them in any recipe that can do with nuts, but this time, I chose to go with Pecans, as something told me they would be great with the cranberries, and I was not disappointed at all! A lover of almonds, I dumped some slivered almonds too into the batter, and the result was a wonderfully soft bread that is pretty enough to be served at feast, and tasty enough to be cherished with family. This moist Cranberry Orange Bread is an out-and-out winner indeed, sure to serve as a fitting start to your day!
I was really happy with the way this beautiful bread turned out. It was truly a treat with my morning tea. Off this goes to Sia's WBB-Summer Feasts and also to Susan who's hosting SHF-Berries this month!

Ingredients
Makes one 9x5x3 inch loaf

1/2 cup pecans - coarsely chopped
1 cup fresh or frozen cranberries(sweetened) - coarsely chopped
3 tbsp slivered almonds
2 cups whole-grain pastry flour
1 cup granulated white sugar
1 1/2 tsp baking powder
1/2 tsp baking soda
1/2 tsp salt
1 tbsp orange zest
4 tbsp cold unsalted butter - cut into cubes
1 large egg well beaten
3/4 cup freshly squeezed orange juice
1 tsp vanilla extract

Eggless Recipe
** substitute 1/4 cup sour cream instead of the egg in the recipe

Method
Preheat oven to 350 degrees F (180 degrees C) and place rack in the center of the oven. Grease a loaf pan with non-stick vegetable spray and set aside.

In a small bowl, combine the beaten egg with the orange juice and vanilla extract. For the eggless version, replace the egg with 1/4 cup sour cream and beat it with the orange juice and vanilla.

In a large dry bowl, whisk the flour with the sugar, baking powder, baking soda, salt, and orange zest. Cut the butter into small pieces and blend it into the flour mixture with a pastry blender or two knives. The mixture should look like coarse crumbs.

Fold the wet ingredients into the dry ingredients. Stir in the chopped cranberries, almonds and pecans.

Pour into the prepared pan and bake for 50 - 60 minutes or until a toothpick inserted into the center of the cake comes out clean.

Remove from oven and let cool on a wire rack for about 10 minutes. Then remove the bread from the pan and let cool completely before slicing.

Enjoy this delicious Cranberry-Orange Bread with your breakfast, or as a dessert with some more fruits and whipped cream!

Related Recipes:
Chocolate-Banana Bread with Cranberries
Italian Tomato Herb & Cheese Bread
Hazelnut Mocha Coffee Cake

Related Tags
, , ,


Read more!

Moong Dal Kachori (Stuffed Lentil Baskets)

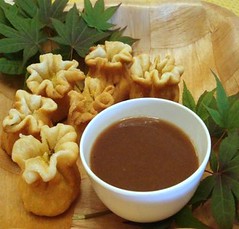
moong-dal-kachoriMy mom used to make really delicious Crispy Moong-Dal Kachoris, and I still remember what a glutton I used to be when I ate those! of course, I could never have enough of these, or the lilva kachoris, their second counterpart. But then, crisp and flaky on the outside, and warm and flavorful on the inside, you just can't stay away from Kachoris! Do I sound like a commercial? guess what, once you try the recipe below, you'll start promoting it yourself! I've used moong-dal, or yellow (split-pea) dal as a filling, but you can experiment with peas, tuver dal, or even any other lentil of your choice. It looks like hard work, but believe me, its totally worth the effort! Flavored with lentils sauteed in spices, and complete with raisins and shredded coconut to add that extra punch, these Moong Dal Kachoris are a treat to the eyes and the tongue!
Ingredients

For the Kachori Crust
2 cups all-purpose flour or whole grain white flour
1 tbsp semolina (fine rava)
4 tbsp warm melted ghee (clarified butter)
salt - to taste
1/2 tsp lemon juice
hot water - to knead the dough
oil for frying kachoris

For the Filling
2 cups Moong Dal - soaked for at least 2 hours
1 tspn cumin seeds (jeera)
1 tspn carom seeds (ajwain) or saunf
1/2 tspn asafoetida (hing)(optional)
1 tspn turmeric powder (haldi)
1 tspn red chilli powder
2 tbsp green chilli-ginger paste
1 tbsp grated coconut
1 tbsp coriander - finely chopped
a bunch of raisins (optional)
2 tspn sugar
2 tbsp oil
salt and lemon juice - to taste

Method
Take the Moong Dal and let it soak in water for at least 3-4 hours.

For the kachori, mix the salt, semolina, lemon juice and flour together and add the warm ghee to it. Mix well so that the entire flour is oiled and forms crumbles. Now knead it using warm water into a firm dough(not too thin or soft, just pliable enough). The warm water and rava will help make the crust more crispy. Cover with a wet cloth and leave aside for 25-30 mins.

Now take a saucepan, add 2 tbsp oil to it, then add the cumin, carrom seeds, saunf and asafoetida. When seeds splutter, add the soaked moong dal to this, after removing all water. Season with green chilli-ginger paste, salt, lemon juice, sugar and the spices. Cook for 8-10 mins, then remove from flame. Mix the grated coconut, chopped cilantro and raisins and keep aside.

Now divide the dough into small portions, and roll each one into 3" diam. disc. Put a large spoonful of the filling into the center, then fold the dough over the filling to form a pouch and shape it into a basket from the top(as shown in the pic) You can grease your palms a little and roll the ball between them to form an even ball if that's easier. Make sure to seal the filling at the top else it will all ooze out when you fry them! Repeat for all the kachoris.

Deep Fry: Now heat oil in a wok and deep fry 3-4 kachoris at a time over low-to-medium flame till they are golden brown in color. Do not fry on high heat as they will turn brown but will be uncooked from inside.

Baked: Alternately, you can preheat the oven to 350 degrees. Then place the kachoris on a large oven tray. Space them at least half inch apart and apply light margarine to them with a brush. Now bake them for 10-15 mins, then rotate the tray by 180 degrees to bake on the other side for 10 mins, or till the surface becomes light brown in color.

Of course, the fried version is much tastier than the baked one, but if healthy is more important to you than tasty, you know what to choose!

Tip for Crispy Kachoris The semolina and the lemon juice help make the crust more crispy. Also, fry the kachoris on low heat, then when its time to serve, refry them or bake them on high temperature; this will also make them crispier.

Lay out your beautiful Moong Dal Kachoris on a platter. Serve hot with Green Chutney or sweet-and-sour Tamarind Chutney. I'm sending these to Dangit who's collecting Party Dishes for her daughter's first b'day!

Related Recipes:
Crispy Vegetable Samosas
Tuver-Lilva ni Kachori
Khasta Dal Kachori Chaat

Related Tags
, , , , ,


Read more!

Apricot-Ginger-Cranberry Muffins

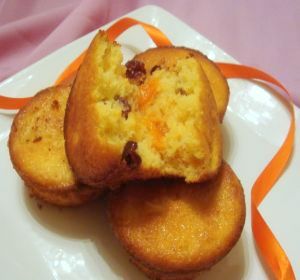
apricot-ginger-muffinsApricot and Ginger are great flavors when paired together, and you'll vouch for it yourself once you try these delicious Apricot Ginger Muffins; its like capturing the essence of summer in a muffin! Made with fresh apricots and melted butter, these muffins are very soft and moist. The shredded ginger adds the perfect amount of spice, filling your kitchen with a refreshing aroma. I decided to add a handful of craisins, because it made my muffins look prettier and taste better! A simple blend of fresh ingredients baked together, these amazingly moist and flavorful Apricot & Ginger Muffins have become one of my favorite recipes!

These are perfect breakfast muffins, and have become my preferred choice, with a cup of Ginger-Cardamom tea, so try it for yourself and see! Off these go to Aparna who's hosting BBD#12 featuring "Small Quick Breads" this time!

Ingredients
Makes 12 muffins

1-3/4 cups self-raising flour
*** use 1 cup AP and 3/4 cup wheat flour for a healthier version
3/4 cup fresh apricots - diced
*** or use one 8.5-ounce can sweetened apricot chunks - drained
1 egg
*** substitute 1/4 cup vanilla or plain yogurt for an eggless version
1 cup castor sugar
1/2 tsp salt
1-1/2 tsp ground ginger
4 tbsp dried cranberries or craisins
3/4 cup milk
1/3 cup melted butter
1 tsp baking powder

Method
Preheat oven to 400 degrees F and prepare muffins pans by greasing with non-stick spray.

In a large bowl, sift together the flour, sugar, baking powder, salt and ginger.

Combine egg, milk, melted butter and chopped apricots in another bowl. beat a little to combine everything together. Now add this to the dry mixture just until combined. Do not over-beat. Fold in the cranberries and stir.

Spoon the mixture into the moulds and bake for 20 minutes, until the tops rise and become golden.

Let the muffins cool in the rack for 10 mins. Then gently remove then from the moulds and transfer to a wire rack to further cool for another 5-7 mins.

Serve the deliciously soft muffins with a cup of tea. The sweet apricots are balanced by the semi-sweet cranberries, and the mild taste of ginger gives them a lovely flavor. The ginger flavor will be stronger one day later, which I really liked! The melted butter gives these Apricot Ginger Muffins a soft and rich texture that's hard to ignore!

Related Recipes:
Spiced Vanilla Tea Cupcakes
Low-Fat Pear-Almond-Yogurt Mini Cakes
Chocolate Muffins with Chocolate Sauce
Low-Fat Blueberry Muffins

Related Tags
, , ,


Read more!

Cherry & Almond Sour Cream Scones

cherry almond sour cream sconesCherries, the small and sweet dark red fruits that are full of flavor and fiber are found in plenty in summer. I paired my fresh Cherries with the ever classic Almonds and sour cream to bake these delicious Cherry-Almond Scones. Packed with anti-oxidants and beta-carotene, Cherries are aptly called the "latest super-fruits"! These breakfast scones taste heavenly right out of the oven, and serve to be a perfect weekend brunch with hot tea! Combined with whole-grain flour, sour cream and a pinch of nutmeg, my Cherry Almond Scones were the best way to enjoy the fresh fruits; however, you could easily make these with dried cherries as well. If you enjoy cherries, its hard to resist these scones!

Ingredients
3/4 cup fresh or dried sweet cherries - pitted and chopped
** If you use dried cherries, soak them in warm water for an hour to plump them up
2 cups whole-grain pastry flour
2 teaspoons baking powder
1/2 tspn baking soda
1/2 tspn salt
1/4 cup brown sugar
1/3 cup cold butter - cut into chunks
1 cup sour cream
1 large egg
1/2 teaspoon almond extract
a pinch of nutmeg (optional, for aroma)
1/4 cup slivered almonds

Method
Preheat the oven to 400 degrees.

With a pastry knife, cut the butter into the dry ingredients until it is granular in appearance, like sand, just more grainier.

Mix the sour cream, egg, nutmeg and almond extract together in a small bowl. Make a well in the center of the dry ingredients and add the liquid mixture.

Fold in the slivered almonds and cherries, leaving a few for garnish. Stir with a spatula just until moistened. (Note: DO not mix a lot else the cherries will leave out juice and color the entire dough)

Dust the countertop with all-purpose flour and turn the dough out. Pat the dough into a disk about 12 inches in diameter. Cut the disk into small discs or wedges, whatever shape you like.

Place them on an ungreased baking sheet with room around them to expand. (Note: Do not use grease as that can turn your scones more brown in color!) You can use a parchment paper if you want.

Top each scone with split cherries and pinch them slightly in the dough. Bake for 12-15 minutes or until they are lightly golden. Transfer to a wire rack till they cool down.

Variations: Try these with golden raisins or dried currants, and use shredded coconut instead of almonds.

These scones taste wonderful straight out of the oven; the tartness of cherries is wonderfully paired with alomnds, and sour cream imparts a smooth rich texture. Top them with some butter or jam, kids would love a topping of whipped cream too! I simply enjoyed my Cherry-Almond Scones with a cup of hot tea for my breakfast!

Related Recipes:
Cranberry-Walnut Scones (Eggless)
Mango Streusel Breakfast Cake
Wholegrain Blueberry Pancakes


Read more!

Vanilla Tea Cupcakes

vanilla cupcakesTea parties are one of the most easiest ways to entertain on a bright summer afternoon. Some crackers or cookies, vanilla cupcakes and a pot full of simmering hot tea or coffee and you are all set to make your friends feel at home and enjoy a quiet afternoon, reliving fond memories. Vanilla is such a universal flavor it can make anything taste better, and cupcakes are one of the simplest contenders! But here, we adapt a simple cupcake recipe for a tea-party by adding some spices and orange zest, and decking them up with a dollop of jam and some sprinkling of powdered sugar. Pulled out of mini-muffin pans and placed on a party platter, these vanilla tea cupcakes will surely make it worth your while!
Ingredients
Makes about 12 mini cupcakes

1-1/4 cup all-purpose flour
1/2 tsp baking soda
2 tsp vanilla essence
1 tsp all-spice (or nutmeg, cinnamon,dry ginger and star anise pwd)
1/2 tsp orange zest
1/2 tsp salt
2 tbsp vegetable oil
1/4 cup granulated sugar
1 large egg
2 tbsp unsalted butter - softened
4 tbsp confectioners' sugar - to sprinkle on top
4 tbsp jam (raspberry or strawberry works best)

Method
Preheat oven to 350 degrees F. In a bowl, whisk together the flour, the baking soda, the spices, and a pinch of salt.

In another bowl, cream together the butter and the granulated sugar, beat in the egg, till its light and fluffy. Add the oil and whisk together.

Slowly combine the liquid mixture to the dry ingredients, beating well after each addition. Finally add the vanilla essence and orange zest to the batter.

Divide the batter among 12 paper-lined mini-muffin tins and bake the cupcakes in the middle of an oven for 15 to 20 minutes, or until a tester comes out clean.

Turn the cupcakes out onto a wire rack and let them cool completely. Whip up the jam mixture with 4 drops of water. Drop a tiny spoonful on the top of each cupcake. Dust with some confectioner's sugar.

The spices do balance well with the orange zest and vanilla...so there's a little bit of everything without any of it being overpowering..and the jam and sugar on the top makes it worth serving at a party!:) No need for frosting!! Serve these Vanilla Tea Cupcakes at a tea-party and dazzle your friends and guests, just like I'm sending them to Erin's Spring Tea party event!

Similar Recipes:
Chocolate Cupcakes with Orange Cream Sauce
Raspberry-filled Molten Cupcakes


Read more!

Chocolate Banana Bread or Cake

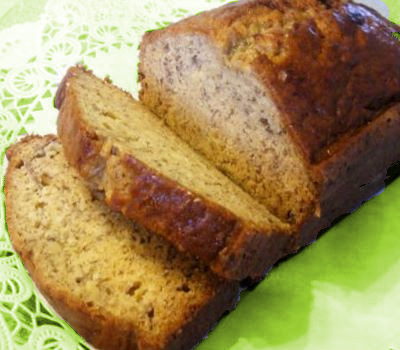
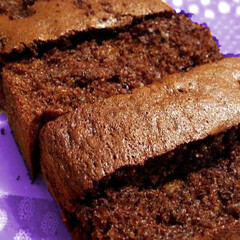
banana-chocolate breadChocolate Banana Bread has been an old favorite, and needs no preamble or praise. The pairing of chocolate and bananas is one of the most reliable ones where baking is concerned, and though bananas were traditionally baked with walnuts or pecans for the classic banana-nut loaf, this new combination has indeed found a place in the hearts and minds of foodies. Chocolate can get really overpowering, especially in baked desserts; but this Chocolate-Banana Bread recipe still focusses on the distinct flavor of ripe bananas, while chocolate, nuts and dried cranberries make it both festive as well as delicious! Every chef will certainly have their signature banana bread recipe, but there's always room to improve it, right?! So here I share my recipe with you - a classic recipe adapted to make it eggless and also to suit my tastebuds!

Banana Bread is pretty similar to a Banana Cake, except for its shape; while one is baked in a loaf pan, the other uses a non-loaf pan!:) But this, to me, is not really a valid difference! I chose to bake my chocolate-banana bread cum cake in a rectangular pan rather than a standard loaf one, and believe me, it still tasted as great as ever! Serve this with a cup of tea or coffee for a bread-like feeling; drizzle some chocolate syrup and whip cream on the top and it transforms into a decadent dessert. So now you have not one, but two wonderful reasons to put those 4-day old ripe aged and yellow-skinned bananas to good use! Also, a tip from Stephanie's chocolate-banana bread recipe about sprinkling some brown sugar on the top to get the crusty golden texture while it bakes sounds interesting! This beauty is on its way to the Banana-Bread Bakeoff hosted by Not Quite Nigella!

Eggless recipe - A banana bread or cake is the most appropriate type of recipe to make into an eggless version. Mashed bananas impart the same texture and softness to the cake that egg yolks would; you might have to compromise just a tiny bit on the fluffy part, but if you use self-raising flour, even that difference would melt away! So for an eggless version, omit the eggs, use self-raising flour instead of regular one, add 1 more banana, and 1/2 tsp more of baking soda.

Ingredients
1 and 1/2 cups all-purpose flour
1/4 cup cocoa powder
1 tspn baking powder
1 tspn baking soda
1 tspn salt
1 cup brown sugar
1/4 cup unsalted butter (at room temperature)
1 large egg
2 large ripe bananas (yellow-skinned ones)
1 tbsp milk
3 tbsp walnuts - coarsely chopped
3 tbsp dried sweetened cranberries
1/2 tsp nutmeg (optional)
1 tbsp poppy seeds (optional)

Method
Preheat the oven to 350 degrees F. Butter a 9 x 5 x 3 inch loaf pan, or a 9x9 inch cake pan and set aside.

Cream the sugar and butter in a large mixing bowl until light and fluffy. Add the egg and beat well till it becomes light and fluffy.

In a small bowl, mash the bananas with a fork. Mix in the milk and nutmeg. In another bowl, mix together the flour, cocoa powder, baking powder, baking soda, salt, cranberries, poppy seeds and walnuts.

Add the banana mixture to the creamed sugar mixture and stir until combined. Add the dry ingredients, mixing just until flour disappears.

Pour the batter into prepared pan and bake for about 1 hour (depending on oven and pan size), until a toothpick inserted in the center comes out clean (Do the toothpick test after 45 mins, then bake a little longer if needed).

Set aside to cool on a rack for 15 minutes. Remove the bread from the pan, then use a buttered knife to cut into slices.

Suggested Variations: White chocolate chips, raisins, pecans, macadamia nuts, toasted walnuts

This delicious Chocolate Banana Bread is great with your morning tea. The cranberries and poppy seeds add a nice flavor as well as a crunch to the loaf, at the same time balancing the sweetness of bananas. As bananas tend to give out a distinct smell as they get old, it is best to consume this bread within 2-3 days while keeping it refrigerated.

Similar Recipes:
Hazelnut & Mocha Bread
Banana & Walnut Fluffy Cake
Persimmon & Chocolate Spice Cake
Fried Banana with Ice Cream


Read more!

Baked Rigatoni Pasta with Homemade Garlic and Basil Marinara Sauce

Pasta is such a staple dinner item in so many homes, it can get kind of challenging to make it interesting! But of course, thanks to hundreds of different types of pasta varieties, and also the packaged sauces that supermarkets horde for you, there are plenty of options to choose from, especially when different people in the same house have different tastes. Like I love penne and rigatoni, but my dear husband settles for nothing but linguine or fettucine. So if I have to feed him something else, I have to package it in a clever and tasty way so he can crib a little but still enjoy his food:) I generally like the sun-dried tomato alfredo sauce for my pasta, but this time I tried making the traditional Italian Marinara sauce at home, just to see if I could compete with Raagu and Bertoli!! It is so simple to make this sauce at home, and you'd save so much money, not to mention the flavor that a fresh Homemade Garlic and Basil Marinara sauce can add to your pasta! I tried the Baked Rigatoni with my homemade sauce; Sprinkled with fresh parmesan and mozzarella cheese, and flavored with fresh herbs and garlic, you just cannot resist this dinner dish!

Ingredients

For the Marinara Sauce
2 cans tomato puree
1 can diced roma tomatoes
2 tbsp olive oil
3-4 large cloves of garlic - minced
2 tbsp dried basil leaves
2 tsp dried oregano leaves
1/2 small onion - finely chopped
2 tsp salt
1 tsp sugar
lemon juice - add to taste if necessary
water - add to adjust consistency

Pasta Ingredients
10 oz Rigatoni pasta
1/2 capsicum - finely diced
1 cup mozarella cheese
1/2 cup parmesan cheese
2 tsp dried thyme leaves

Method

Pasta Sauce
Place the olive oil in a small frying pan and warm to medium heat. Add the garlic and onions, and cook until onions are slightly tender.

Now add the tomato puree and the diced tomatoes, add 1/2 cup water and allow to cook. for 5 minutes so the tomato pieces get almost mashed and tender. Then add the dried basil and oregano leaves, salt, sugar and more water if needed, then cover and let it simmer on medium-flame till all flavors are mixed well.

Once cooked, remove from flame and allow to cool a little. If you like a smoother texture, you can blend this mixture after it has cooled down to form a puree. I like a chunky texture, so I left it as it is.

Baked Rigatoni
Take the Rigatoni and cook it according to package instructions.

Take 1 tbsp olive oil and heat it. Add the chopped capsicum to it and cook until slightly tender.

Preheat oven to 375°F. Grease a square or rectangular glass baking dish or spray with non-stick cooking spray. Layer the cooked pasta in the dish, top it with the sauted capsicum, then gently pour the marinara sauce over it. Add the parmesan and mozzarella cheese to it. Sprinkle some more dried basil and thyme leaves on the top if you like.

now bake at 375 degrees for about 20-25 minutes, until the pasta and sauce is cooked well and the cheese begins to melt. Change the setting to Broil and cook for another 2 mins, just so the cheese on the top gets a little golden in color.

Remove from oven and allow to cool a little. Serve the hot Baked Rigatoni Pasta with a side salad or garlic bread for a delicious Italian Meal! This goes to Mathy's JFI-Garlic event!!

Similar Recipes:
Fettucini Alfredo with Basil
Spagetti with garlic and Cilantro
Ravioli in Saffron and Cream Sauce


Read more!