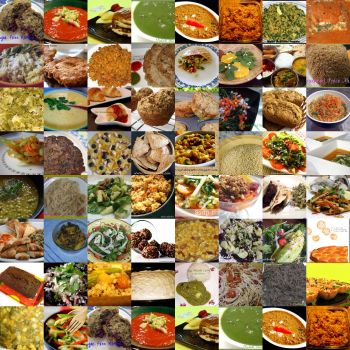
Healthy Cooking Recipe Roundup

Healthy Recipes Blog EventI called out for Healthy recipes, something that is not especially healthy, but incorporates techniques, methods or ingredients that make every day recipes into healthier options, and I'm proud to say that your participation was wonderful! I am more than happy at having received so many lovely entries, and I thanks each and every one of you for making this event a huge success! Without any further wait, take a look at the classic ways to make "Healthy Cooking" a part of your life!

If you are looking for healthier meal options, so you can get your kids and family to enjoy their favorite recipes, but just in a healthier fashion, you have come to the right place! You'll find here an invigorating collection of Healthy Recipes, from Soups and Salads to Savoury Dishes, and even delicious Desserts, we have all of it covered! So next time you get into the kitchen to cook, make sure you Cook Healthy!

Healthy Recipes Roundup


Soups & Salads
Suganya - Summer Vegetable Salad with Lemon Vinaigrette
Sharon - Summer Black-Bean Quinoa Salad
Ivy - Beetroot Salad with Pesto
Trupti - Grilled Vegetable Salad
Jennifer - Tabbouleh with Hummus
Christie - Stir-Fried Chilli Potato
Karuna - Pear-Apple-Spinach Salad
Lore - Vegetable Soup with Shreds
Esi - Quinoa Salad with Asparagus
Stacey - Strawberry Salad
Andrea - Roasted Carrot Soup
Christina - Healthy Summer Salad
Tigerfish - Carrot & Tomato Salad
Vani - Carrot Alfalfa Sprouts Kosambri
Ning - Sweet Potato & Greens Salad
Archana - Spicy Pumpkin Soup
Jugalbandi - Arugula-Orange-Fennel Salad
Cham - Rice Noodle Soup
Mythreyee - Tomato-Spring Onion & Moong Soup
Harini - Spinach Shorba(Soup)
Nathan - Roasted Tomato-Onion & Pepper Gazpacho
Mansi - Mix Vegetable & Coconut Milk Soup

Savoury Stuff
Mansi - Nutritious Aloo-Masala Poha(Rice Flakes)
Jayashree - Muringa(Drumstick Leaves) Dal
RedChillies - Phyllo-Shell Golgappa
Jaysree - Raagi Idiyappam
FoodyGuru - Cherry Tomato Whole-Wheat Pasta
Meera - Thalipeeth Pizza
Natasha - Cracked Wheat Rice Pilaf
Pavani - Egg Masala Curry
Sra - Chholar Dal
Arul - Whole-grain Veg Swirl Bread
Vaishali - Tempeh Crabcakes
Jayashree - Chorchori(Vegetable Medley)
Priya - Vegetarian Sloppy Joe Sandwich
Priyanka - Thai Noodles with Tofu
Aparna - Lump-proof Vegetable Rawa Upma
Lisa - Mung-Tamarind Dal
Jude - Perfect Brown Rice
Zlamushka - Baked Tortilla Chips
Usha - Chickpea & Oat Cutlets
Deepti - Lauki-Chana Dal
Sireesha - Dahi Vada with Zero Oil
Srivalli - Ragi Roti(Indian Flatbread)
The Taste Tinkerer - Masala Muffin Vadai
Sia - Tofu & Veg Fried Rice
Vani - Baby Kailan Stir-Fry
Alka - A Healthy Meal
Sushma - Kashayam
Neha - Healthy Oat Dosa
Geeta - Lauki in Pita POckets
Prajusha - Soy Chunk Fry
Sheetal - Fried Rice with Soya Nuggets
Nandini - Green Thai Curry
Skribles - Stuffed Paneer Masala
Divya - Mung Dal Usli
Bhawana - Methi Granule Masala
Asha - Dal Bukhara
Nags - Vegetable Curry Noodles
Vandana - Cabbage & Carrot Thoran
Tracy - Stuffed Portobello Mushrooms
Mansi - Handvo (Healthy Vegetable Cornmeal Cake)

Sweets & Desserts & Drinks
Martha - Carrot-Zucchini Bars
Dee - Healthy Date Rolls
Tal - Organic Old-Fashioned Apricot Cake
Annarasa - Multigrain Banana Bread
Dragon - Peach & Cherry Crisp
Mansi - Whole-Grain Blueberry Pancakes
Sunita - Peanut Butter & Puffed Rice Squares
Louise - Rye & Raisin Honey Loaf
Srilekha - Mango Fruit Custard
Ricki - Zucchini-Pineapple Mini Loaves
Ashley - Applesauce & Oat Bran Muffins
Tasty Treats - Healthy Crescent Rolls
Smita - Chocolate Almond Torte
Dhivya - Crunchy & Nutty Oatmeal Cookies
Kalva - Strawberry-Kiwi & Honey Smoothie
Mansi - Beetroot & Cucumber Juice
Priya - Berry-Tasty Pancakes
Rosemary - Sugar-free Muffins
Mansi - Low-Fat Strawberry Vanilla Cake

This is a huge collection of some seriously good stuff, and it'll take me some time to dig through your entries and find a winning recipe that will win the coveted cookbook! However, looks like its going to be very tough to decide a winner by myself; so I shall pick the top 10 finalists and you, my readers, will Vote for the Best Healthy Recipe that you think deserves to win!

So stay tuned as I scour your blogs in the coming week to choose the finalists for this Healthy Cooking contest. Till then, enjoy these delicious recipes, and thank you all once again for filling this page with a wonderful list of Healthier options that surely support the "Eat Well, Live Well" cause!


Read more!

Cranberry Orange Bread with Pecans

cranberry-orange-bread
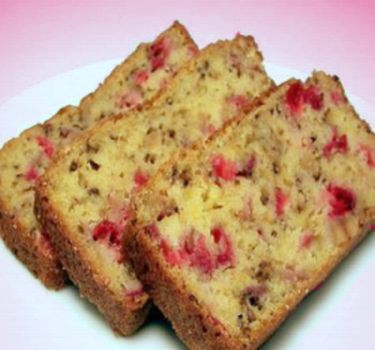
Cranberry Bread, flavored with zesty Orange and filled with the goodness of Pecans and crushed almonds, and topped with a layer of butter or maple syrup, served with a cup of hot tea or coffee! Does it sound like a scintillating breakfast or not? I, for one, would never refuse a platter like this, and neither should you! Cranberries are a wonderful summer fruit, and when paired with citrusy orange, it invokes a lovely flavor and aroma that is sweet and invigorating. I love walnuts, and pretty much throw them in any recipe that can do with nuts, but this time, I chose to go with Pecans, as something told me they would be great with the cranberries, and I was not disappointed at all! A lover of almonds, I dumped some slivered almonds too into the batter, and the result was a wonderfully soft bread that is pretty enough to be served at feast, and tasty enough to be cherished with family. This moist Cranberry Orange Bread is an out-and-out winner indeed, sure to serve as a fitting start to your day!

I was really happy with the way this beautiful bread turned out. It was truly a treat with my morning tea. Off this goes to Sia's WBB-Summer Feasts and also to Susan who's hosting SHF-Berries this month!

Ingredients
Makes one 9x5x3 inch loaf

1/2 cup pecans - coarsely chopped
1 cup fresh or frozen cranberries(sweetened) - coarsely chopped
3 tbsp slivered almonds
2 cups whole-grain pastry flour
1 cup granulated white sugar
1 1/2 tsp baking powder
1/2 tsp baking soda
1/2 tsp salt
1 tbsp orange zest
4 tbsp cold unsalted butter - cut into cubes
1 large egg well beaten
3/4 cup freshly squeezed orange juice
1 tsp vanilla extract

Eggless Recipe
** substitute 1/4 cup sour cream instead of the egg in the recipe

Method
Preheat oven to 350 degrees F (180 degrees C) and place rack in the center of the oven. Grease a loaf pan with non-stick vegetable spray and set aside.

In a small bowl, combine the beaten egg with the orange juice and vanilla extract. For the eggless version, replace the egg with 1/4 cup sour cream and beat it with the orange juice and vanilla.

In a large dry bowl, whisk the flour with the sugar, baking powder, baking soda, salt, and orange zest. Cut the butter into small pieces and blend it into the flour mixture with a pastry blender or two knives. The mixture should look like coarse crumbs.

Fold the wet ingredients into the dry ingredients. Stir in the chopped cranberries, almonds and pecans.

Pour into the prepared pan and bake for 50 - 60 minutes or until a toothpick inserted into the center of the cake comes out clean.

Remove from oven and let cool on a wire rack for about 10 minutes. Then remove the bread from the pan and let cool completely before slicing.

Enjoy this delicious Cranberry-Orange Bread with your breakfast, or as a dessert with some more fruits and whipped cream!

Related Recipes:
Chocolate-Banana Bread with Cranberries
Italian Tomato Herb & Cheese Bread
Hazelnut Mocha Coffee Cake

Related Tags
, , ,


Read more!

Chocolate Ganache Recipe

chocolate-ganache-recipeChocolate Ganache is widely used in desserts, and is perhaps one of the best ways to enjoy the real taste of dark, luscious chocolate! Ganache is a French term referring to a smooth mixture of chopped chocolate and heavy cream. Some say it originated in Switzerland, while some believe it was invented in Paris. To make ganache, hot cream is poured over chopped chocolate and the mixture is stirred until velvety smooth. The proportions of chocolate to cream can vary depending on its use, and you can use dark, milk, or white chocolate and add different flavorings such as liqueurs and extracts to make Ganache variations. Discussed below, is the basic Ganache recipe, its techniques, and different uses and variations for you to experiment with!

A legend proposes that "Ganache" was the outcome of a culinary accident, whereby a chocolatier's apprentice spilled cream in the chocolate he was melting. The chef called the apprentice 'Ganache', a word meaning, figuratively, 'fool'. Masterpieces are created by accidents, and may Lord bless that "ignorant fool" for giving us the legacy of Ganache!

The taste and quality of the Ganache is primarily dependent on the quality of chocolate you start with. A chocolate with a higher cocoa butter content will produce a ganache that is firmer than one made with a chocolate that has a low cocoa butter content. A chocolate with a velvety smooth texture will produce a ganache that is velvety smooth. The most important point to consider when choosing a chocolate for making ganache is whether you like the chocolate when eaten out of hand.

There are 2 ways to make Ganache:

1. The chocolate is melted, cooled to room temperature and the cream is beaten into it
2. The cream is brought to a boil, removed from the heat and the chocolate is beaten into it.

The second method is generally recommended, as there is less chance of burning the chocolate this way. But you are free to try both and choose the one that works out best for you. The proportion of chocolate to cream is critical, as this determines the stiffness of the resulting Ganache. Add more cream and you will get a softer product, add more chocolate and you'll get a stiffer mixture.


Ingredients
Makes about 1 and 1/2 cup of ganache

8 ounces semisweet or bittersweet chocolate - chopped into pieces
3/4 cup heavy whipping cream
2 tbsp unsalted butter
1 tbsp liqueur (optional, like cognac, grand marnier, kahlua, etc)

Method
Place the chopped chocolate in a medium sized stainless steel bowl and set aside.

Heat the cream and butter in a medium sized saucepan over medium heat. Bring just barely to a boil; do not over-heat, else the cream will get scorched and burnt.

Now place a damp towel on your counter, place the pan of hot cream on the towel, and then add the chopped chocolate to the cream. Let it stand for 5 mins, then stir with a whisk until smooth. Add the liqueur to flavor the ganache.

Tips & Tricks:
To make a smoother ganache, set the pan in a larger pan of hot water and stir until it is soft enough to spread like a sauce.

In order to make a stiff ganache, place the pan in a larger pan of ice water to cool the mixture just until it comes to spreading consistency. Remove from the ice bath at this point to make sure it doesn't harden too much. Use this mixture as a filling between cake or cookies.

You can store the ganache for three days at room temperature, or up to one week in the refrigerator. You can even freeze it for up to three months. Just soften or melt it before using.

Recipes with Ganache
There are several ways you can use Ganache in your dessert recipes. It can be used in filled chocolates, in frosting cakes, making truffles, as topping on pies & ice-creams, as a glaze on cakes, donuts or muffins, or simply to add a smooth choclatey flavor to lattes, drinks or any other deserts. Depending on how you want to use it, here are a few recipe variations that could come in handy.

Chocolate Glaze or Sauce - use 1 part cream to 3 parts chocolate. Pour immediately over cake or ice-creams or desserts, when its barely warm and still liquid.

Chocolate Truffles - use 1 part cream to 2 parts chocolate. Allow the ganache to cool completely, then refrigerate it for 15-20 mins. Then scoop some mixture and shape into truffles, and set again to refrigerate till ready to serve. Coat with cocoa powder, powdered sugar or chopped nuts to form various kinds of truffles.

Chocolate Frosting - use 1 part cream to 3 parts chocolate. Allow the ganache to cool to room temperature, or even a bit chilled so it becomes spreadable, then use it to frost a cake. Pour the ganache in the center of the cake, then quickly spread with a spatula over the sides, using big strokes to create an even coating of frosting.

Gooey Chocolate Filling - use 1 part cream to 1 part chocolate. Use immediately in cakes or molten muffins and pastries, while still in melted form. It can also be refrigerated and stored, then used as a filling later after warming it a little.

These are more than enough ways to start enjoying the rich chocolate flavor. Be it cakes, truffles, tarts, ice cream, molten muffins or something as simple as chocolate-covered strawberries, Ganache can make it look beautiful and taste divine! So experiment with melted chocolate, and get the most out of a simple Ganache Recipe!

Related Recipes:
Moist Espresso Kahlua Brownies
Molten Chocolate Lava Cake
Mini Chocolate-Strawberry Heart Cakes

Related Tags
, , , ,


Read more!

Wine Basics - How To Choose & Buy Wine

wine basics-selecting wineDo you feel confused and intimated when you have to choose a wine as a gift or to serve one at dinner? Are you someone who loves entertaining, but lacks enough knowledge about wines? There is a plethora of information about how to choose and select wine, and how to pair wine with food, and as fine dining becomes global, it becomes imperative to have at least some basic knowledge about the types of wine, and how to judge a good one from a mediocre one. While most people just feel comfortable going with some chosen labels, this may not always be your best bet! There are several factors which determine how to select a wine, and this article focuses on the basic wine knowledge that would help enhance your understanding of different types of wine, thereby making it easier to choose!

Whether you're out to dinner at an upscale restaurant or preparing a meal at home, knowledge about wine pairing will always be useful. Certain wines go best with certain meals and deciding on the right food & wine pairing can be a lot easier if you know the basics of wine characteristics. After a recent trip to Napa Valley, where we saw the entire wine-making process at a famous vineyard, I know I am much better educated about wines than I ever was, and definitely in a position to share my findings with you!

The types of grapes used to make a wine, often known as "Varietal", are the most important factor in the taste of the wine. However, the flavors are also affected by factors such as soil, exposure to sunlight, climate, how the grapes are handled and fermented, types of yeast used, whether the wine is aged in wood or oak etc

Types of Wines
The two basic types of wines are "White wines" and "Red wines". All wines are manufactured with the help of grapes, however, different flavors are created by combining the basic wine with fruits, or other additives, and the actual manufacturing and ageing process. The main difference between red and white wine is that the juice used to make red wine includes the skins, stems and seeds of red or black grapes. White wines can be made from any color grape, but only the clear juice of the grapes is used. The general rule of thumb is that red wines tend to be heavier while white wines are usually sweeter. When the wine is prepared in a way that produces carbon dioxide, it is termed as a "Sparkling wines". The sparkling wine that specifically comes from the Champagne region of France, is what we all know as "Champagne". These wines can be further categorised as Sweet or Dry, which is usually scaled between 00 (very dry) to 6 (very sweet). So the first thing you do, is narrow down your choices so you know what characteristics to focus on next!

Tannin Content in Wine
Tannins are a vital ingredient in wines, especially red wines, and form the basis of wine reviews. It comes from the stalks, skins and pips of grapes. Tannins in a young wine produce a bitter, taste on the palate, while the aged wines are more subtle in flavor. Also, the "length" of a wine, which means the amount of time the sensations of taste and aroma persist after swallowing, is a good measure to consider. This can only be learnt after you've tasted a few wines, but recommendations work the best here.

Acidity of the Wine
Acids of various types are present in wine, and are essential to the wine's longevity and also to its taste. A higher acidity makes the wine more tart and sour tasting; whereas a low acidity results in flat tasting wine that has a higher chance of getting spoilt. Acidity, when present in the right quantities, makes all other flavours in the wine stand out, including the undertones of fruit, spice and herbs. The flavour in wine that you would describe as tangy, sharp, refreshing, bracing, bright, crisp or zingy is basically due to its Acidity.

Alcohol Content of the Wine
You've probably heard of full-bodied wines, which is a direct measure of its alcohol content. The variations in the "body" of wine are like varying levels of fat-content in milk. On every wine label you’ll notice a percentage of alcohol by volume, which indicates its body as follows:

* 7.5% - 10.5% indicates light body
* 10.5% - 12.5% indicates medium body
* 12.5% and over indicates full body (very high alcohol)

Reading the Wine Label
This is perhaps the most important step for a novice person as reading a wine label carefull will often help you know the type, variety, flavor, region and vintage of the wine. It also pays to read the owner's notes on the bottle as it may guide you about the flavors, brand and sometimes, even food pairing suggestions. Plus, the wine labels will generally have Wine Grades printed on them; the higher the rating, the better the wine. Its recommended not to go below 80 points for a quality wine.

Vintage of the Wine
Vintage simply refers to the year the wine was made. Because weather cooperates better in some years than in others, certain years will produce better wines than others. The amount of rain that falls close to harvest time typically determines the amount of sugar in the grapes and thus, will affect the taste. It is beleived that 1990 was a great year for all wine, so if you are looking to impress, order a 1990 bottle and you are less likely to make a wrong choice! But remember, older wine does not necessarily mean better wine, especially if the older bottles were from a bad vintage.

Where to Buy
It is important to purchase wine from liquor outlets that take proper care of their wine, like buying directly from the winery. Extreme heat or cold, direct sunlight, and dramatic temperature fluctuations are not good for wine. Its is also important to buy wine from a vintner who uses quality Oak barrels for the ageing process, as this imparts a lovely flavor to the wine. Also, before you buy, make sure the wine is filled up to the neck of the bottle, the cork is not pushing out of the bottle, and there are no signs of leakage.

Wine has been a favorite topic among food and drink connoisseurs since long, and even if you are not into Wines, it can come in handy to learn the basics of wine. There are several factors to consider when selecting a bottle of wine, and those mentioned above are just a few of them. Understanding the basics of wine types, selections, storage and taste will surely add new dimensions to your wine experience. Hope this article serves to be an efficient introduction to help you choose and select the best wine, fit for your taste and your budget!

Related Articles:
How to Pair Wine with Food
Napa Valley - California's Wine Country
Tips to Host a Perfect Cocktail Party


Read more!

Sabudana Khichdi (Sago Khichdi)

sabudana-sago-khichdi
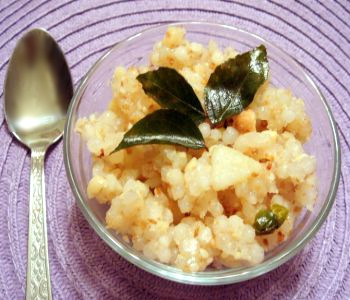
"Sabudana Khichdi" is a very popular Indian snack often enjoyed for breakfast, during fasting, or as a light meal. Sabudana, also known as Pearl Sago, is a whole-grain similar to tapioca; small white seeds that become soft and spongy when soaked in water and turn translucent when cooked. Sabudana Khichdi is one of my all-time favorite recipes, where these sago grains are mixed with boiled potatoes, peanuts and sauteed along with curry leaves and spices. As Sago tends to be starchy, the trick lies in making the khichdi in such a way that it doesn't stick together and become a clump, so here's a tried-and-tested recipe to make a delicious and crunchy Sabudana Khichdi, which is non-sticky and is sure to please your tastebuds a lot!

To make non-sticky Sabudana Khichdi, it is important to follow the method used for soaking. Too little water, and your sabudana will stay hard and raw; too much water and turns all mushy and sticky. So use only as much water as needed to immerse the sago, and not more! Also, the crushed peanut powder helps lend it better texture and remove some of the stickiness, as well as adding a crunch to the khichdi.

Ingredients
2 cups sabudana/sago
2-2 1/2 cups water - for soaking the sabudana
1 medium potato - boiled and chopped
1/2 cup peanuts - ground into coarse powder
** reserve 1 tsp for garnish
10-12 raw peanuts
3 tbsp ghee(clarified butter)
** Ghee gives it a special taste, but you can substitute with veg oil
1 tsp cumin seeds
2 green chillies - finely chopped
6-7 curry leaves - whole
1-2 tsp sugar (adjust per taste)
salt and lemon juice - to taste
chopped cilantro - optional for garnish

Method
Take the sabudana in a container, and add enough water that it barely comes above the surface of the sabudana. Leave it like this for at least 6-7 hours(or overnight) The sago will soak up all the water, fluff up to become soft and spongy, so it can be squeezed between your fingers, without feeling sticky or mushy. Drain out any excess water, if remaining.

meanwhile, chop your boiled potatoes into small cubes. Take a non-stick pan and add the ghee to it. When it's a bit hot, add the cumin seeds, chopped green chillies and curry leaves and the raw peanuts.

Cook the potatoes for about 2 mins, then add the soaked sabudana to the pan. Add the coarsely ground peanut powder, salt, sugar and lemon juice and mix well, but gently. Cook the sabudana on medium-flame and stir gently to prevent clumping together. Once everything is mixed, and the sabudana khichdi gets a light-brown color, adjust for seasoning to your taste. Then remove from flame and set aside.

Microwave Method
Nupur suggests a wonderful microwave recipe for sabudana khichdi which can make your job easier! Just toss your boiled potatoes, ghee, cumin seeds, green chillies, peanut powder, and the soaked sabudana into a microwave-safe glass container and cook it for 6-8 mins, in spurts of 2 min each (m/w for 1 min, then let it stand 2 mins, then repeat the procedure till needed). Season with salt, lemon juice and sugar and give it a final whir for another 1 min till your khichdi gets cooked. I've never tried this method, but I'm inclined to try it soon!

Garnish with the reserved peanut powder ( and chopped cilantro if you like) and serve the hot Sabudana(Sago) Khichdi with a cup of tea for a light and fulfilling meal!

Related Recipes:
Aloo Masala Poha
Handvo - Savoury Steamed Cake
Vegetarian Potato Cutlets

Related Tags:
, , ,


Read more!

Aloo Masala (Batata) Poha - Healthy Breakfast

aloo-batata-poha
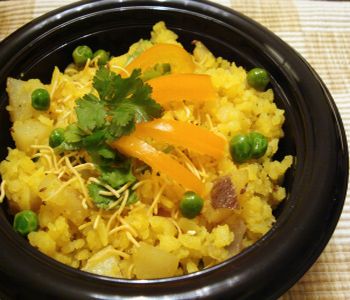
"Aloo Poha", or "Batata Poha", as its called in most places in Gujarat and Maharashtra, is a very well-known and easy-to-make light snack. Mostly savored as a healthy breakfast in most Indian homes, Aloo Masala Poha mainly consists of puffed rice flakes & potatoes, but it has evolved over time to include cooked veggies like boiled potatoes, onions, peas, carrots and coriander. Low in fats and carbs, and high in fiber and vitamins, this is a perfect breakfast meal. It is also popular as a light evening snack, often served with tea. My recipe combines more veggies than usual, and a final sprinkling of sev (thin flat noodles) for a glamorous touch. Light and refreshing, yet filling at the same time, this Aloo(Batata) Masala Poha is a simple and healthy meal!

Ingredients
3 cups poha (rice flakes)
1 medium-sized potato - boiled and chopped
1/2 onion - chopped finely
1/4 cup peas - boiled (or frozen and thawed)
2-3 tbsp carrots - boiled and chopped (optional)
1 green chilli - finely chopped
4-5 curry leaves
1/2 tsp cumin (jeera) seeds
4 tbsp oil
salt & lemon juice - to taste
1 tsp turmeric powder
1 tsp sugar
chopped cilantro - for garnish
thin sev or shredded coconut - for garnish (optional)

Method
Take the poha (puffed rice) in a bowl and wash it thoroughly with water. Soak them in water for 1 min, then transfer to a colander and let all the water be drained. leave them while you prepare the other stuff. They will puff up a little and get softened as they soak the water.

Take the chopped carrots and peas in a bowl, add a little water and microwave them for 5 mins until they become soft and cooked. Alternately, you can boil them along with the potatoes.

Take 4 tbsp oil in a non-stick pan, add the curry leaves and the cumin seeds. When they start spluttering, add the chopped green chillies and the onions. Saute them till they turn slightly pinkish-golden in color.

Add all the boiled vegetables, sugar, salt and turmeric powder and cook for 5 mins. Finally add the soaked poha and mix everything well ltogether, evenly coating with oil and spices. Sprinkle a little water if desired, then cover with a lid and let it cook for another 8-10 mins, stirring occasionally to prevent sticking to the vessel.

Add the chopped coriander, leaving some for garnish, and give it a final stir. Remove from flame and transfer to a serving bowl.

Garnish with some more chopped cilantro and shredded coconut or sev if you like. Serve the Aloo(Batata)Poha hot with a cup of tea for breakfast, or some lemonade on a breezy summer evening!

Related Recipes:
Vegetable Handvo - Savoury Lentil Cake
Paneer-Tomato-Capsicum Muffins
Spinach Onion Dosa(Pancakes)


Read more!

Moong Dal Kachori (Stuffed Lentil Baskets)

moong-dal-kachori
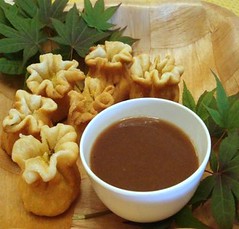
My mom used to make really delicious Crispy Moong-Dal Kachoris, and I still remember what a glutton I used to be when I ate those! of course, I could never have enough of these, or the lilva kachoris, their second counterpart. But then, crisp and flaky on the outside, and warm and flavorful on the inside, you just can't stay away from Kachoris! Do I sound like a commercial? guess what, once you try the recipe below, you'll start promoting it yourself! I've used moong-dal, or yellow (split-pea) dal as a filling, but you can experiment with peas, tuver dal, or even any other lentil of your choice. It looks like hard work, but believe me, its totally worth the effort! Flavored with lentils sauteed in spices, and complete with raisins and shredded coconut to add that extra punch, these Moong Dal Kachoris are a treat to the eyes and the tongue!

Ingredients

For the Kachori Crust
2 cups all-purpose flour or whole grain white flour
1 tbsp semolina (fine rava)
4 tbsp warm melted ghee (clarified butter)
salt - to taste
1/2 tsp lemon juice
hot water - to knead the dough
oil for frying kachoris

For the Filling
2 cups Moong Dal - soaked for at least 2 hours
1 tspn cumin seeds (jeera)
1 tspn carom seeds (ajwain) or saunf
1/2 tspn asafoetida (hing)(optional)
1 tspn turmeric powder (haldi)
1 tspn red chilli powder
2 tbsp green chilli-ginger paste
1 tbsp grated coconut
1 tbsp coriander - finely chopped
a bunch of raisins (optional)
2 tspn sugar
2 tbsp oil
salt and lemon juice - to taste

Method
Take the Moong Dal and let it soak in water for at least 3-4 hours.

For the kachori, mix the salt, semolina, lemon juice and flour together and add the warm ghee to it. Mix well so that the entire flour is oiled and forms crumbles. Now knead it using warm water into a firm dough(not too thin or soft, just pliable enough). The warm water and rava will help make the crust more crispy. Cover with a wet cloth and leave aside for 25-30 mins.

Now take a saucepan, add 2 tbsp oil to it, then add the cumin, carrom seeds, saunf and asafoetida. When seeds splutter, add the soaked moong dal to this, after removing all water. Season with green chilli-ginger paste, salt, lemon juice, sugar and the spices. Cook for 8-10 mins, then remove from flame. Mix the grated coconut, chopped cilantro and raisins and keep aside.

Now divide the dough into small portions, and roll each one into 3" diam. disc. Put a large spoonful of the filling into the center, then fold the dough over the filling to form a pouch and shape it into a basket from the top(as shown in the pic) You can grease your palms a little and roll the ball between them to form an even ball if that's easier. Make sure to seal the filling at the top else it will all ooze out when you fry them! Repeat for all the kachoris.

Deep Fry: Now heat oil in a wok and deep fry 3-4 kachoris at a time over low-to-medium flame till they are golden brown in color. Do not fry on high heat as they will turn brown but will be uncooked from inside.

Baked: Alternately, you can preheat the oven to 350 degrees. Then place the kachoris on a large oven tray. Space them at least half inch apart and apply light margarine to them with a brush. Now bake them for 10-15 mins, then rotate the tray by 180 degrees to bake on the other side for 10 mins, or till the surface becomes light brown in color.

Of course, the fried version is much tastier than the baked one, but if healthy is more important to you than tasty, you know what to choose!

Tip for Crispy Kachoris The semolina and the lemon juice help make the crust more crispy. Also, fry the kachoris on low heat, then when its time to serve, refry them or bake them on high temperature; this will also make them crispier.

Lay out your beautiful Moong Dal Kachoris on a platter. Serve hot with Green Chutney or sweet-and-sour Tamarind Chutney. I'm sending these to Dangit who's collecting Party Dishes for her daughter's first b'day!

Related Recipes:
Crispy Vegetable Samosas
Tuver-Lilva ni Kachori
Khasta Dal Kachori Chaat

Related Tags
, , , , ,


Read more!

Are Nutrition Supplements Necessary & Safe?

diet-nutrition-supplements
We all know the importance of providing useful nutrients to our body, and how they are absolutely essential to maintain a healthy life! And yet, as demands of work increase and life becomes more and more stressful for families and individuals, we often find it hard to make sure that we are eating a balanced diet! The result, our body suffers from deficiencies, our bones grow weak, brain-function decreases and a routine physical examination shows that we need to start getting food supplements! Most of us know that nothing can come as close to natural products, fruits and vegetables in getting our daily nutrition needs, and yet, when most of your meals consist of grab-to-go foods, how does one make sure that your body gets what it deserves? Does taking vitamin and diet supplements help? And more importantly, is it safe?

Defining Nutrition Supplements
The word "supplement" means exactly that: a nutrient or group of nutrients (vitamins, minerals, protein, carbohydrates, fats and oils) that are meant to supplement, but not substitute for a healthy diet that you eat on a regular basis. People have such busy lives that instead of trying to cook healthier food, they think its easier to just pop in a pill or two to compensate for the loss; it is this approach that needs to be changed. Many studies have shown that vitamins from supplements do NOT act on the body in the same way as vitamins from foods. Plenty of foods naturally contain vitamins, and some popular foods such as breakfast cereals are fortified with vitamins and minerals. Almost all fruits and vegetables provide one kind or another of these essential nutrients, so try to eat 5 times a day, and space out your intake to fulfill your daily needs.

Are Supplements Necessary?
You probably don't need a general vitamin-mineral supplement if you are eating a reasonably varied diet most of the time, aren't restricting calories to lost weight, and generally don't skip meals. This doesn't mean you have to be a "perfect eater", it only means that you have to be careful you try to eat at least one balanced meal a day.

For some people suffering from certain medical conditions, it is imperative to prescribe supplements to alleviate their conditions. Even people on a strict weight-loss plan or those on a muscle-building plan, are restricted to a certain type of diet, and hence may need to compensate by use of supplements. A common scenario is for older men, generally suffering from prostrate or sexual health problems.

Use Supplements with Caution
That said, its not always possible, nor feasible to entirely depend on food to provide all nutrients to our body. Too little of just one vitamin may disturb the body's balance and cause health problems. But taking too many vitamins can also be dangerous. Older men are generally prescribed to take medicines to fight prostate cancer, but people can have the same results if they increase consumption of natural foods like Tofu, Fruits and Soy Milk .

However, a further reason to avoid overdose of vitamins is that they can have toxic effects. We do need vitamins, but more is not necessarily better. This is particularly true with the fat-soluble vitamins that will be stored in the liver, like vitamin A. They can eventually reach toxic levels and cause liver damage. Even the water-soluble vitamin C can cause diarrhea at levels of 2000mg a day, which is lower than the amount some people take in the hope of staving off colds.

Myth About Herbal Supplements
Some people feel herbal supplements have no side-effects, and are generally safe. However, recent research has proved that this is not entirely true. No federal regulations standardize quality of ingredients contained in these products, and some of these products contain steroids which can be harmful for the body when taken in wrong proportions. Additionally, not enough testing is done on the actual products that you see on the shelves in stores, so you can't be sure that what is stated on a supplement label even resembles what you are getting.

Some Supplements Can Be Useful
There are several people for whom the availability of supplements is a boon. For strict Vegans who do not include egg or milk products in their diet, iron, zinc and vitamin Bl2 supplements may be needed; those who can't digest dairy products may need calcium intake; People who suffer from chronic constipation may benefit from a regular serving of Fiber, and pregnant women are almost always advised to take some sort of multi-vitamin and iron supplements by their doctors. These are cases where artificial methods compensate for a genuine need of nutrients, but even then, extreme caution and consultation with your doctor about dosage and type of supplements is of utmost importance.

There's No ShortCut to Health
Most of the supplements were originally created to compensate for deficiencies; but as people started pouncing on them for every small need, manufacturers saw a huge market for their products. Some people go to great lengths to look beautiful, have a drop-dead-gorgeous figure, lose 15 pounds in 2 weeks, increase their sex-drive, or look like Arnold Schwarzenegger overnight! These are the people get carried away by the ads and do not pay attention to the harmful side effects scrawled in very fine print on the supplement bottles. There is NO shortcut to beauty or health, and though some supplements do help you maximize your efforts, it's always important to chart out a long-term plan to avoid any sudden damage or ill-effects to the body.

Natural is by far the Best
A few decades ago, there was nothing like nutrition supplements, and yet people used to live a healthy and happy life with a high age ratio. But over time, our food quality has deteriorated; with use of fertilizers & pesticides, we can't really be sure of the nutrients present in even raw foods, and the hectic life schedules have made it even more difficult to stick to a healthy routine.

Every action in our body consists of metabolic reactions that require specific nutrients. Without sufficient amounts of these various vitamins and minerals, the biological processes can become slowed, abnormal, or impaired. hence, we should make it a point to see that we do not deprive ourselves of these important nutrients. Try to include balanced foods in your diet which can fulfill your Recommended Daily Allowance(RDA). If this seems to be impossible without using supplements, or you are forced to use them as part of a special medical plan, start with small doses under the advice and supervision of professional doctors or registered dietitians, and choose only branded supplements from trustworthy pharmacies.

Diet & Nutrition Supplements can help you meet your daily requirements and keep you healthy, but going overboard will only affect your health negatively. Do not self-diagnose a deficiency yourself, and remember that supplements can never replace a healthy well-balanced diet.

Related Articles:
Natural Fruit Facials for Healthy Glowing Skin
Food & Diet that Helps Increase Brain Power
Food that Helps you Lower your Cholesterol


Read more!

Moist Espresso Kahlua Brownies

kahlua-espresso-brownies
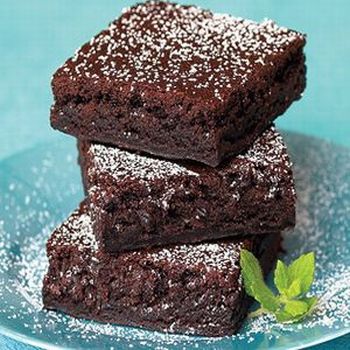
One of my favorite chocolate indulgences comes in the form of these heavenly Espresso Kahlua Brownies; with chocolate, coffee and a hint of Kahlua liquer, there's hardly anyone who could resist these moist brownies! They are soft, cake-like, yet chewy at the same time, just how I like them! Its really easy to make these brownies, and you can experiment with several flavored coffee powders to make a version that works best for you. Though these are a perfect treat any time of the day, the espresso and chocolate make it an ideal choice for breakfast! A piece or two of these ultra-moist and delicious Espresso Brownies will be enough to get you up and running in the morning!

Ingredients
Makes 8-10 brownies - adapted from Epicurious' Kahlua Brownies

1 cups semisweet chocolate chips
1/4 cup bittersweet dark chocolate - chopped
1/2 cup butter (1-stick)
1 cup all purpose flour
3 tbsp cocoa powder
1 tsp baking powder
1/2 tsp salt
2 tbsp instant espresso
1 tbsp kahlua liqueur (optional)
1-1/4 cup sugar (or adjust to your taste)
2 eggs
2 tsp vanilla extract
confectioner's sugar(optional)- for dusting

Method
Preheat oven to 350°F. Grease a 11 x 7-inch (or 10" square) non-stick baking pan and set aside.

Melt the chocolates and butter over a double boiler & stir until smooth to make a ganache. Then remove from heat and keep aside.

In a large bowl, sift together the flour, cocoa powder, baking powder, salt and espresso. In another mixing bowl, beat sugar, egg and vanilla on medium high until light colored, about 2 minutes.

Beat in the chocolate until well combined. Add the flour mixture slowly into the egg mixture until well blended. Finally stir in the Kahlua liqueur. If you like your brownies a bit fudgy, leave it like this; but if you need a more cake-like texture, beat the mixture for another 1 min, to aerate it even further.

Pour the mixture into the prepared baking pan and bake for 35–40 minutes or until a toothpick inserted 2 inched from the side comes out clean.

Cool completely, then cut into 8-10 rectangles. Dust them with a sprinkling of powdered (confectioner's) sugar if you like!

Tip: To make clean cuts of the brownie, allow it to cool entirely (about 45-60 mins) once out of the oven. Then use a plastic knife to cut into even slices.

Variations: You can use amaretto instead of kahlua, and use other flavored coffee instead of plain espresso.

Serve these classic Espresso Kahlua Brownies with a hot cup of cappuccino or top them with some whipped cream for a party dessert! Off these go to Dhangitt who's collecting Party Dishes for her daughter's b'day!

Related Recipes:
Sour Cream Raspberry Brownies
Layered Kahlua CheeseCake
Marbled Cream Cheese Brownies

Related Tags
, , ,


Read more!

Roti Indian Bistro - San Francisco, California

roti-bistro-san franciscoLocated in the West Portal district of San Francisco, Roti Indian Bistro is a small yet wonderful restaurant serving eclectic Indian food. A place that's really hard to get reservations for, we were finally able to make it to this restaurant last week for dinner, and everyone at the table was happy with what we got. But as a chef and a food-critic who loves trying out new restaurants, I personally felt that it was a good experience, but I don't think it was one of my best experiences, especially with all the hype I'd heard about it. Neverthless, Roti Bistro is a better than average Indian restaurant in San Francisco, and surely deserves a few words of credit.
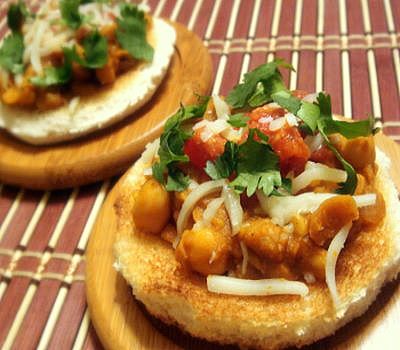
Located in the busy portal district, Roti Indian Bistro is a small place, compared to other grand indian restaurants I've seen elsewhere. But the cute place is nicely decorated to make the dining room a warm and inviting space with dramatic colors on the walls, soft light, and photos and paintings that portray the rich cultural essence of India. The kitchen at the end of the dining room can be seen from any seat, and you can watch the cooks in action. The owners, Rustom and his wife, are Burmese, but they are well-versed with Indian food, its tastes and methods of preparation. All of the wait staff is extremely well-trained, courteous and efficient. But they are not too helpful if you are new to Indian food and need real suggestions! Our waitress just recited the house specials as recommendations, and I knew she wasn't as conversant with indian food as expected.

Roti's is the first menu where we could NOT find "Malai Kofta" or "Paneer Butter Masala". Can you believe that? We went for the next best- Paneer Makhani, Bhindi Masala, which was tasty, hence compensated for us not finding our favorites on the menu. The appetizers are strictly ok, nothing glamorous here. The Tandoori section offers a better variety, but there's not a single vegetarian entry, not even Paneer Tikka! That was a huge negative for me!

They have a range of veg and non-veg curries, with loads of options for lamb, chicken and seafood lovers. The breads are also average; we simply ordered the Assorted Bread Basket which comes with Roti, Garlic & Basil naan, and Onion Kulcha - again, just ordinary. The Mango Lassi was $5.00, and I was shocked at the exorbitant price! The Drinks menu had quite a few indian classics, like Kingfisher beer and other premium wines. The Kulfi was really nice for the dessert, and I'd recommend it for sure.

Roti Bistro is a high-end restaurant, and you can expect a tab of at least $20-$25 per person. But be prepared for this - SFO now has a policy of mandatory health-care, and apparently, most of the restaurants add this to you bill, and at Roti Bistro, it was 4.5% of our bill; and that's besides a 15% gratuity!! I think that's outrageous, and would seriously make me think twice about visiting again!

To sum up, on the positive side, the food is good, and the ambience is pleasant. But there are several negatives to consider - very small space makes it difficult to get reservations, the open kitchen combined with the small space makes it a bit stuffy, especially if you are right next to the kitchen, and I think the food is definitely not worth the price. So I'd rate this restaurant a 3.5/5, maybe because I'd prefer Shiva's, Darbar or Amber India restaurant any day over this place. But for someone who's in the area and is looking for Indian food in San Francisco and doesn't mind blowing off some money, you can try to give Roti Bistro a chance and see for yourself!

Address:
53 W Portal Ave
San Francisco, CA 94127
(415)- 665-7684
Roti Indian Bistro

Roti Indian Bistro on Urbanspoon


Read more!

Chana Masala (Chickpea) Sandwich - Indian Bruschetta

indian-bruschetta-chhole sandwich"Chhole" or "Chana Masala" is a popular Indian recipe for curried chickpeas, boiled and cooked in a delicious tomato-onion sauce, and flavored with mild Indian spices. I love chickpeas, and I really really love Bruschetta, so its not hard to guess how this beautiful Chhole Sandwich aka "Indian Bruschetta" was born! It was a totally on-the-spur-of-the-moment appetizer that I cooked up one night, making use of some leftover chickpeas topped on grilled bread, with some tomatoes, basil, cilantro and parmesan cheese. But it was such a successful experiment that I am sure I'll be making this more often! I was actually quite surprised at how presentable it looked too! But looks apart, this is one of the tastiest open sandwiches one could eat, even if you don't have an Indian palate. In fact, I actually liked this Indian Chickpea Bruschetta version more than a traditional Italian Bruschetta!! now isn't that something?!!

Ingredients
4 slices of wheat or white bread
8 tbsp chhole (curried chickpeas) - recipe below
4 tbsp fresh firm tomatoes - chopped finely
2-3 tbsp shredded cheese (parmesan or mozarella)
salt & pepper - to taste
fresh or dried basil - to taste (optional)
some finely chopped cilantro

Chhole (Chana Masala - Curried Chickpeas)
2 cans boiled chickpeas
1/2 onion - chopped finely
2 tbsp tomato puree
1 tbsp tamarind sauce mixed with 1/4 tsp sugar
2 tbsp yogurt (optional)
1 tsp ginger-garlic paste
1/2 tsp red chilli powder
1/2 tsp turmeric powder
1 tsp garam masala or chhole masala
salt & lemon juice - to taste
water - if needed
3 tbsp oil

Method
Drain the chickpeas from the can and wash them well. Heat a saucepan, add the oil, and saute the onions till they become soft. Add the ginger-garlic paste and the tomato puree.

Next, mix the tamarind paste in the yogurt and blend well. Add this to the tomato puree. Add all the spices and the drained chickpeas, then cover and let it cook for 10-15 mins, until the chickpeas are thoroughly cooked and become soft. Check for taste, adjust salt, lemon juice and spices, then remove from heat and keep aside to cool a little.

You can cook the Chhole ahead of time and preserve it refrigerated for upto 24 hours.

Garnish your Chana Masala with some onion rings and choped coriander, and you can serve it hot with Breads or Rice.

Assembling the Chhole Sandwich
Take each slice of bread; remove the edges and cut into desired shapes if you want. Toast the bread slices in a regular toaster or in an oven for 5-7 mins at 300 deg F, till they are lightly browned and crispy.

Mix the chopped tomatoes with salt, pepper, cilantro/basil, and toss to coat well. Set aside for 5 mins to let the flavors blend.

Take the curried chickpeas; put 2 tbsp each of this mixture onto the toasted bread(you can spread a little butter if you want). Top with a spoonful of tomato mixture, then sprinkle some shredded cheese on the top. Microwave each slice for 2 mins to let the cheese melt, or you can reheat the entire batch in an oven on a cookie sheet.

Serve these delicious and beautiful Chhole Sandwiches as an appetizer or a party snack. They look great and taste great, and are high in proteins and fiber, and I can bet your guests would love this Indian take on Bruschetta!

Related Recipes:
Shiitake Mushroom Crostini
Steamed Vegetable Timbales
Traditional Italian Bruschetta


Read more!

Apricot-Ginger-Cranberry Muffins

apricot-ginger-muffinsApricot and Ginger are great flavors when paired together, and you'll vouch for it yourself once you try these delicious Apricot Ginger Muffins; its like capturing the essence of summer in a muffin! Made with fresh apricots and melted butter, these muffins are very soft and moist. The shredded ginger adds the perfect amount of spice, filling your kitchen with a refreshing aroma. I decided to add a handful of craisins, because it made my muffins look prettier and taste better! A simple blend of fresh ingredients baked together, these amazingly moist and flavorful Apricot & Ginger Muffins have become one of my favorite recipes!

These are perfect breakfast muffins, and have become my preferred choice, with a cup of Ginger-Cardamom tea, so try it for yourself and see! Off these go to Aparna who's hosting BBD#12 featuring "Small Quick Breads" this time!

Ingredients
Makes 12 muffins

1-3/4 cups self-raising flour
*** use 1 cup AP and 3/4 cup wheat flour for a healthier version
3/4 cup fresh apricots - diced
*** or use one 8.5-ounce can sweetened apricot chunks - drained
1 egg
*** substitute 1/4 cup vanilla or plain yogurt for an eggless version
1 cup castor sugar
1/2 tsp salt
1-1/2 tsp ground ginger
4 tbsp dried cranberries or craisins
3/4 cup milk
1/3 cup melted butter
1 tsp baking powder

Method
Preheat oven to 400 degrees F and prepare muffins pans by greasing with non-stick spray.

In a large bowl, sift together the flour, sugar, baking powder, salt and ginger.

Combine egg, milk, melted butter and chopped apricots in another bowl. beat a little to combine everything together. Now add this to the dry mixture just until combined. Do not over-beat. Fold in the cranberries and stir.

Spoon the mixture into the moulds and bake for 20 minutes, until the tops rise and become golden.

Let the muffins cool in the rack for 10 mins. Then gently remove then from the moulds and transfer to a wire rack to further cool for another 5-7 mins.

Serve the deliciously soft muffins with a cup of tea. The sweet apricots are balanced by the semi-sweet cranberries, and the mild taste of ginger gives them a lovely flavor. The ginger flavor will be stronger one day later, which I really liked! The melted butter gives these Apricot Ginger Muffins a soft and rich texture that's hard to ignore!

Related Recipes:
Spiced Vanilla Tea Cupcakes
Low-Fat Pear-Almond-Yogurt Mini Cakes
Chocolate Muffins with Chocolate Sauce
Low-Fat Blueberry Muffins

Related Tags
, , ,


Read more!

Chocolate-Dipped Strawberries - Easy Healthy Dessert

chocolate-dipped strawberriesSummer means bountiful berries and delicious desserts, but when it comes to ripe and luscious strawberries combined with rich and dark chocolate, more often than not, a platter of Chocolate Covered Strawberries can easily serve to be the perfect answer for your dessert needs, without being overly heavy! The summer in California gives us huge red strawberries that can be amazingly sweet, and with a packet of Ghiradelli's delightful dark chocolate, you are all set to make a dessert that's pretty and healthy. So for our bbq last evening, I chose to make a dessert of strawberries dipped in chocolate ganache, and as expected, everyone loved it!

Ingredients
6 ounces semisweet chocolate - chopped
15-20 large strawberries - washed and dried very well

Method
Wash all the strawberries, and make sure to keep their stems.

Put the semisweet chocolate into a large heatproof bowl. Fill a medium saucepan with a couple inches of water and bring to a simmer over medium heat. Then turn off the heat; set the bowl of chocolate over the water to melt. Keep stirring until it becomes smooth and silky. (Alternately, melt the chocolate in a microwave at half power, for 1 minute, stir and then heat for another minute or so until melted.), in batches of 30 seconds each.

Once the chocolate has melted, remove from heat. Line a sheet pan with parchment or waxed paper. Holding the strawberry by the stem, dip the fruit into the dark chocolate, lift and twist slightly, letting any excess chocolate fall back into the bowl. Set the strawberries on the parchment paper. Repeat with the rest of the strawberries.

Set the strawberries aside until the chocolate sets, about 30 minutes, or you can refrigerate them for 15-20 mins too, or until its time to serve!

Drizzle your strawberries with some white chocolate if you like. Serve the beautiful chocolate-dipped strawberries with some cold coffee or a round of chocolate-coffee martini!

Related Recipes:
Chocolate-Banana Bread
Molten Chocolate Lava Cake
Liquer-Infused Chocolate Heart Cakes

Related Tags
, , , ,


Read more!

Creamy Asparagus & Mint Soup

creamy asparagus soup Since my last adventure with grilled asparagus salad, I had been itching to try the creamy Asparagus Soup which is considered to be a favorite way to devour the goodness of these stems. Its really easy to make, and there can be several variations that you can try. I chose to make a simple one with creamy white sauce mixed with onions, garlic and spices. Asparagus has a strong flavor by itself, so cream and mild spices help to tone it down a bit, accentuating it in a nice way. I chose to add a few mint leaves as well to give it a nice color, and a wonderfully fresh aroma!

I took inspiration from the traditional Cream of Asparagus soup recipe, and modified it a little to add the mild flavor of mint. I also reduced the cream a little to make it healthier, and substituted that with regular milk. With a touch of thyme, butter and black pepper, this asparagus soup is as refreshing to eat as it looks! Off this goes to Dee's Herb Mania featuring "Mint" this month!

Ingredients
Serves 4-6

2 tbsp + 1 tbsp butter
2 tbsp all-purpose flour
2 tbsp fresh cream (or whipping cream)
2 cups milk
3/4 pound fresh asparagus
1/2 white onion - chopped finely
2 cloves of garlic - chopped finely
3-4 mint leaves
water (as required)
salt and pepper - add to taste

Method
To make the white sauce, melt the 2 tbsp butter in a saucepan over low heat. Blend in the flour, salt and pepper. Stir until smooth. Then add the milk and cream, and allow to cook and thicken, all the while stirring constantly, so it does not stick or get burnt. Once it starts to bubble, remove from flame, give a final stir, and set aside to cool.

Take 1 tbsp butter in another wok; melt it, then saute the onions and garlic in it to it becomes soft and glazed.

Wash the asparagus and cut in 1/2-inch pieces. Cook asparagus in a small amount of boiling water until tender, about 5 minutes. Drain the cooked asparagus, and reserve the remaining liquid.

Set aside a few of the asparagus tips or pieces for garnish. Wash the mint leaves, and blend them with the cooked asparagus to form a smooth paste. Add the onion-garlic mixture to this, and blend again to make a smooth puree. Pass the puree through a food mill or press it through a sieve to remove smaller granules.

Now measure 1 cup of the cooking liquid and allow to boil on medium-heat; add water if needed. Then add the white sauce and pureed asparagus-mint mixture.

Heat thoroughly and check for taste; season with more salt and pepper if desired. Once done, remove from flame and allow to cool a little.

transfer the Asparagus soup into serving bowls. Garnish with a stalk or 2 of the reserved asparagus. Dash some more pepper on the top, or add some more cream if you like. Serve the hot and creamy asparagus soup with some breadsticks, and enjoy the goodness of the greens!

Have a wonderful July 4th weekend, and hope you have a great time with your bbq grills and your family & friends!

Related Recipes:
Tofu & Basil Thai Soup
Healthy Vegetable & Coconut-Milk Soup
Green Peas & Mint Soup
Restaurant-Style Creamy Tomato Soup


Read more!

Handvo - Healthy Vegetable Cornmeal Cake

handvo-steamed-cornmeal-cake "Handvo" is a cherished gujarati recipe which can be called a savoury steamed vegetable cornmeal cake, and is filled with several nutritious ingredients. The flour used in Handwo generally consists of corn, rice and chana dal(lentils). It is then combined with yogurt, spices and healthy vegetables, then allowed to ferment before steaming in a vessel, leading to yield a soft and delicious, yet healthy snack which can be relished with chutneys or tea. It is a beautiful blend of spices, flour, fresh vegetables and yogurt to make a light snack, or in my case a fulfilling dinner!

"Handwa Flour" can be bought from any indian store, and would look like coarsely-ground idli-flour; it consists of chana dal, rawa and cornmeal, so I would recommend trying to get the actual flour first. If you simply cannot find it, then you can use yellow or white cornmeal. Please keep in mind that the latter has a typical corn flavor, which will dominate the flavor of the dish. I'm sending this traditional gujarati recipe to Pam who's hosting weekend-herb-blogging for Kalyn this week.

Ingredients
2 cups handva flour (or cornmeal, as a second option)
1/2 cup bottle gourd or zucchini
3 tsp shredded carrot
1/4 cup fenugreek leaves
1/4 cup spinach leaves (optional)
2 green chillies -finely chopped
4-5 garlic cloves - finely chopped
1/2 tsp ginger paste
3 cups buttermilk (or yogurt mixed with water)
1 tsp soda bi-carb (fruit salt)
** increase it by 1/2 tsp if you don't feel its frothy enough
1 tsp each urad and channa dal
salt - to taste
1 tsp lemon juice
1/2 tsp sugar (optional)

For Tempering
1 tsp mustard seeds
2 tsp sesame seeds
2 tbsp oil

Method
Take buttermilk in a large vessel. Add salt, soda and flour and mix well. As the mixture begins to froth, cover and set aside for 6-7 hours for fermentation.

Grate the bottle-gourd or zucchi and squeeze out all excess water. DO this after the fermentation is done, as leaving bottle-gourd in air oxidises it and makes it turn brown.

Now add all the vegetables, bottle-gourd, spices and green chillies to the flour mixture.

Heat oil in a pan, add urad & channa dals, and the mustard seeds. Allow to splutter, then pour half of it into the batter and mix thoroughly.

Steaming
Pour the mixture into a steel or aluminium container. Place in a Steam Cooker and cook like idlis, for about 25-30 mins, then check to make sure its cooked through. Remove from flame and keep it covered for another 7-10 mins. Once cooled, you can slice it into wedges.

Baking
Put in a greased oven proof deep container. Pour remaining seasoning and sesame seeds on the top. Place in a preheated oven at 350 degrees F for 10 minutes. Then reduce to 300 and bake for another 30 minutes until done. Check by inserting a skewer or toothpick, which should come out clean. Slice into wedges and serve hot.

Individual Pancakes
You can even drop pancake-sized portions in a greased covered cook-top sauce pan instead of the oven, and let it cook for 10 mins, or until done. Its a little time-consuming, but works great when you want to dazzle your guests!

This goes to my Healthy Cooking event, and if you haven't cooked already, please do share you healthy recipes with us for the winner gets a copy of Pam Anderson's new cookbook!

Serve the Handvo with cilantro chutney or tamarind chutney; for me, I'll gladly have it with a cup of Masala Chai!

Related Recipes:
Fluffy Khaman Dhokla
Tirangi Dhokla Sandwich
Baked Green Rava Dhokla


Read more!