
How To Make Fondant Icing

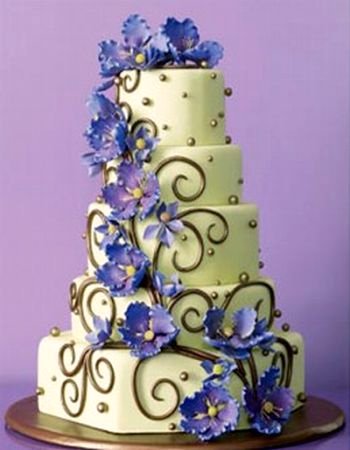
Image courtesy of The Wedding Chicks
Have you ever sat admiring the beautiful cakes that the team of Charm City Cakes create for their beautiful events!! And I bet you have spent more than a few minutes admiring the beautiful wedding cakes that you see these days, with exquisite flowers and pearly designs adorning the smooth and shiny base. Much of this magic is created using Fondant Icing. Sounds familiar? Yesterday I posted a recipe for Cherry Blossom Chocolate Cupcakes on Fun and Food Cafe, and I got several responses from readers, admiring the cupcakes and also the power of Fondant Icing! Some of you also requested a post on how to Make fondant at home. Whether you are a baker who knows how to work with fondant, or are a novice who wants to dabble at making fondant icing yourself, just so you can decorate your cakes and cupcakes, here's a tutorial that will serve as a set of guidelines whenever you want to work with Fondant Icing.
What is Fondant Icing
Fondant Icing is an alternative to butter-based Royal Icing, and is used to decorate cakes and petit-fours. It includes gelatin (or agar-agar in vegetarian recipes) and food-grade glycerin, which keep the sugar pliable and creates a dough-like consistency, that makes it easy to roll out, then use to cover the cakes, rather than slathering it on like regular frosting. It can also be made using powdered sugar and melted marshmallows. It is definitely not as tasty and creamy as Royal Icing, but rolled fondant can be used to cover the cake, giving it a smooth appearance, and also to make more decorations sticking to the base.
How To Make Fondant Icing
Here is a basic recipe that I learnt during my Wilton Cake Decorating classes. it is fairly simple, and I'm sure a novice baker should be able to follow instructions and recreate the recipe.
Ingredients
1 tbsp unflavored gelatin
1/4 cup cold water
1 tsp almond extract
1/2 cup light corn syrup
1 tbsp glycerin
4 cups powdered sugar (confectioner's sugar)
oil or cornstarch
Method
Add the gelatin to a saucepan of water. Sprinkle the gelatin over the water, and allow it to sit for 5 minutes to let it bloom. Simmer the gelatin under low heat, and stir until dissolved completely in the water. Be sure to use a low flame so as not to boil the water, as this can create lumps in the fondant icing; cover the gelatin and keep warm.
Pour the confectioners' sugar into a mixing bowl. Create a medium sized well in the center of the sugar. Add the glycerin and light corn syrup, and do not stir the mixture. Pour the warm gelatin into the well, and then stir the mixture until well blended.
Continue stirring until the mixture becomes stiff. Be sure to stir in one single direction only - switching directions can cause air bubbles to be trapped in the final fondant. Grease your palms with some oil or cornstarch and knead the dough until all of the sugar mixes completely into the fondant.
Now sprinkle cornstarch on a flat surface and knead the fondant on that surface. The cornstarch will prevent the fondant from sticking. Continue the kneading process until the fondant becomes smooth and shiny. Add a few drops of water if the fondant is dry or starts to crack.
Next step is to roll the fondant. For best results, roll the fondant into a ball, wrap it with a plastic wrap, and wait for at least 30 minutes until you roll the fondant out to place it on your cake. You can even refrigerate your wrapped fondant for some more time so that its easier to work with it when decorating your cake.
Adding Color to Fondant
Decorating cakes is not much fun unless you add some color to the end product, right? When you want to color your fondant icing, the best time to do this is when you have rolled the icing into a ball, but not refrigerated it. Get your fondant on your counter and smash it out a bit. Using a toothpick dipped in food coloring gel, add a small glob of the Wilton color on the white fondant. You can also take a golf ball size of fondant and use that to smear the food coloring around on the fondant. Put the ball in the middle, fold the fondant over it and knead the big gob of fondant until all of the color is evenly mixed in. You might need to add a bit of shortening to your hands and counter to keep the fondant from sticking. If it is still too pale, use the same procedure to add in more color. Remember that it is easier to add color than take it out. Start with small amounts of color and add more as you need to.
How To Decorate with Fondant Icing
You should always refrigerate your fondant icing before using it to decorate your cakes. This makes it easier to form shapes with the icing. Remove your icing from the fridge, sprinkle some cornstarch on your countertop, then roll out your fondant on it using medium-pressure and long strokes on a rolling pin. Roll it out till it is 1/4th inch thick, and slightly bigger than the size of your cake that needs to be covered.
Fondant as a Base
To cover a cake, flip over the rolled fondant and stick it gently on the cake, covering all sides evenly. Cut off any extra fondant using cooking scissors and trim the edges. Remember to flip your rolled fondant - the side facing the counter-top is shinier, and this should be on the top of the covered cake.
Fondant Decorations Over Fondant Base
To make small decorations, use the rolled fondant technique, then use different shaped cutters to make your own designs. You can even form 3-D sculptures using your hands and some oil or cornstarch to make shapes. In order to stick the fondant decorations over a fondant base, take a paint-brush - dip it in water and apply it to the smaller decorations. Then gently press it onto the fondant base and hold on for a few seconds so it sticks to the base. Remember to not use too much water as this can cause the color of the icing to tint and mix with one another - just a drop should work just fine!
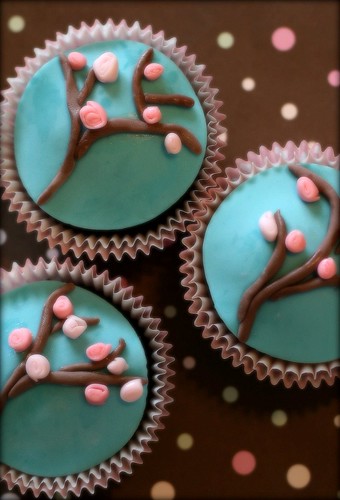 I bet you know more about Fondant Icing now that you've read this tutorial! So are you ready to try your hand at Fondant decorations? Then start with these really simple Cherry Blossom Cupcakes - perfect for upcoming Mother's Day celebrations!
Happy Baking! And do come back and share your experience with us!
If you liked this post, please subscribe to our feed so you'd never miss a recipe or article again!


5 comments :
very informative post! never knew it was so easy to make fondant at home. I am going to give it a try, so I can make those cherry blossom cupcakes u have at the end:)
~Marie
Very useful post!
Love the post. Very informative and I've also had a bad luck doin icing. Try ur tips next time for sure.
Thank you so much for this useful post! I have always wanted to work with fondant but was never sure that I could do it. You have inspired me, thanks!
jessyburke88@gmail.com
This is really informative. I'll try it out when baking.Thanks.
Post a Comment