How to Make Your Own Soy Milk

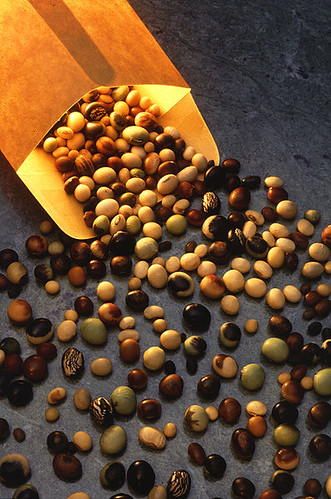
Soya beans are almost a staple food in the US now. They are packed with proteins, and can be eaten raw, as Edamame beans, or as dried beans that are used below to make SoyMilk.
Ingredients
1 cup dry soybeans
sweetener (honey, barley malt or sugar) - add to your taste
water (about 12-15 cups)
Note: Generally, you need about 125 g whole soya beans and 1 liter of water to make 1 liter of soy milk.
Flavoring (optional, like Chocolate, Vanilla, or Almond essence)
Method
Soak the beans overnight or longer(like 10-14 hours). Discard the water and rinse the beans thoroughly. This will also help loosen the hull so you can remove them. This helps in better extraction of soy milk.
Now throw one part beans and 2 parts water into the blender, preferably a high-duty one, like Vitamix, and whiz as long as you can. The finer the pulp, the higher the yield of milk will be. Repeat for any remaining beans.
Take a colander over a large pot, then line it with a cheese-cloth. Pour the mush into cloth-lined colander, and pour the remaining water(if any left) over the pulp.
Now fold the cloth over the mush and press to get as much of the milk out as possible. Save the mush (which is now known as "okara") to make something out of it, like soybean burgers or patties.
Next, bring the extracted milk to a boil, and let it boil for about 5-7 minutes. Reduce the heat, let it simmer for another few minutes, then turn the heat off. Add the desired amount of sweetener to your taste, and even any other flavoring if you want, then allow to cool completely to room temperature. Add the
After cooling, the soy milk is ready and can be kept in the fridge for another 3 days. Soymilk can rot fast, so if you can't use it quickly enough, don't make too much. You can freeze it, but when you thaw it, be prepared for a cottage-cheese kind of taste when you drink it. Adding sweetener and additional flavoring can help reduce this distinct taste though.
There your Soymilk is ready, and now you can go ahead and enjoy it by itself, or use it as a base for making delicious Soymilk Smoothies!
Soymilk Smoothies
Cranberry SoyMilk & Green Tea Smoothie
Vegan Chocolate & Peanut butter Smoothie
If you liked this post, please subscribe to our feed so you'd never miss a recipe or article again!


9 comments :
Homemade Soy milk sounds great. I recently bought Vanilla Soymilk, really liked it. Good for you too.
Happy 2010, have fun Mansi! :)
Wow home made soya milk.You make it sound so easy.
Hmmmmmmmmm .... Nice One
You know I just love soy beans. They are super healthy and almost I can use them in any dish. Soy milk is the best option rather than using milk. And having no taste its even better to use in any of the sweets in replacement to milk.
great post... btw why isn't your cranberry-walnut scone link working? the coconut cookies link opens instead. Wanted to try the scones today. :(
I like the food when it is homemade. It is like an assurance that it is free from possible chemicals that may be put in it.
Thanks guys, homemade Soy milk indeed is better, as its a huge savings in this budget-cutting times!:)
Asha, Happy 2010 to you too! hope you are doing good!:)
Anon - here's my Cranberry scones link:
http://funnfud.blogspot.com/2008/02/eggless-cranberry-walnut-scones-healthy.html
btw, you can always use the Search field at the top to find anything on this blog:) happy baking!
these make great cookies also!
really useful post..
Post a Comment